With over 10 million domains registered, Namecheap is one of the top domain registrars worldwide. I’ve been using Namecheap for 10 years, and here are the key features I love when purchasing domains from here.
- Affordable domain prices
- Free lifetime whois guard privacy protection
- User-friendly domain management dashboard
- Fast and easy domain search & registration
- Quick DNS updates & domain transfers
- Multiple payment methods (Visa/MasterCard & PayPal)
- Responsive and helpful customer support
If you want to use Namecheap for your domain services, this guide will walk you through the process of purchasing a domain step by step.
How to Buy a Domain on Namecheap
Create or Log into Your Namecheap Account
Start by quickly accessing Namecheap via the button below. Once there, either register for a new account or log in to your existing one.
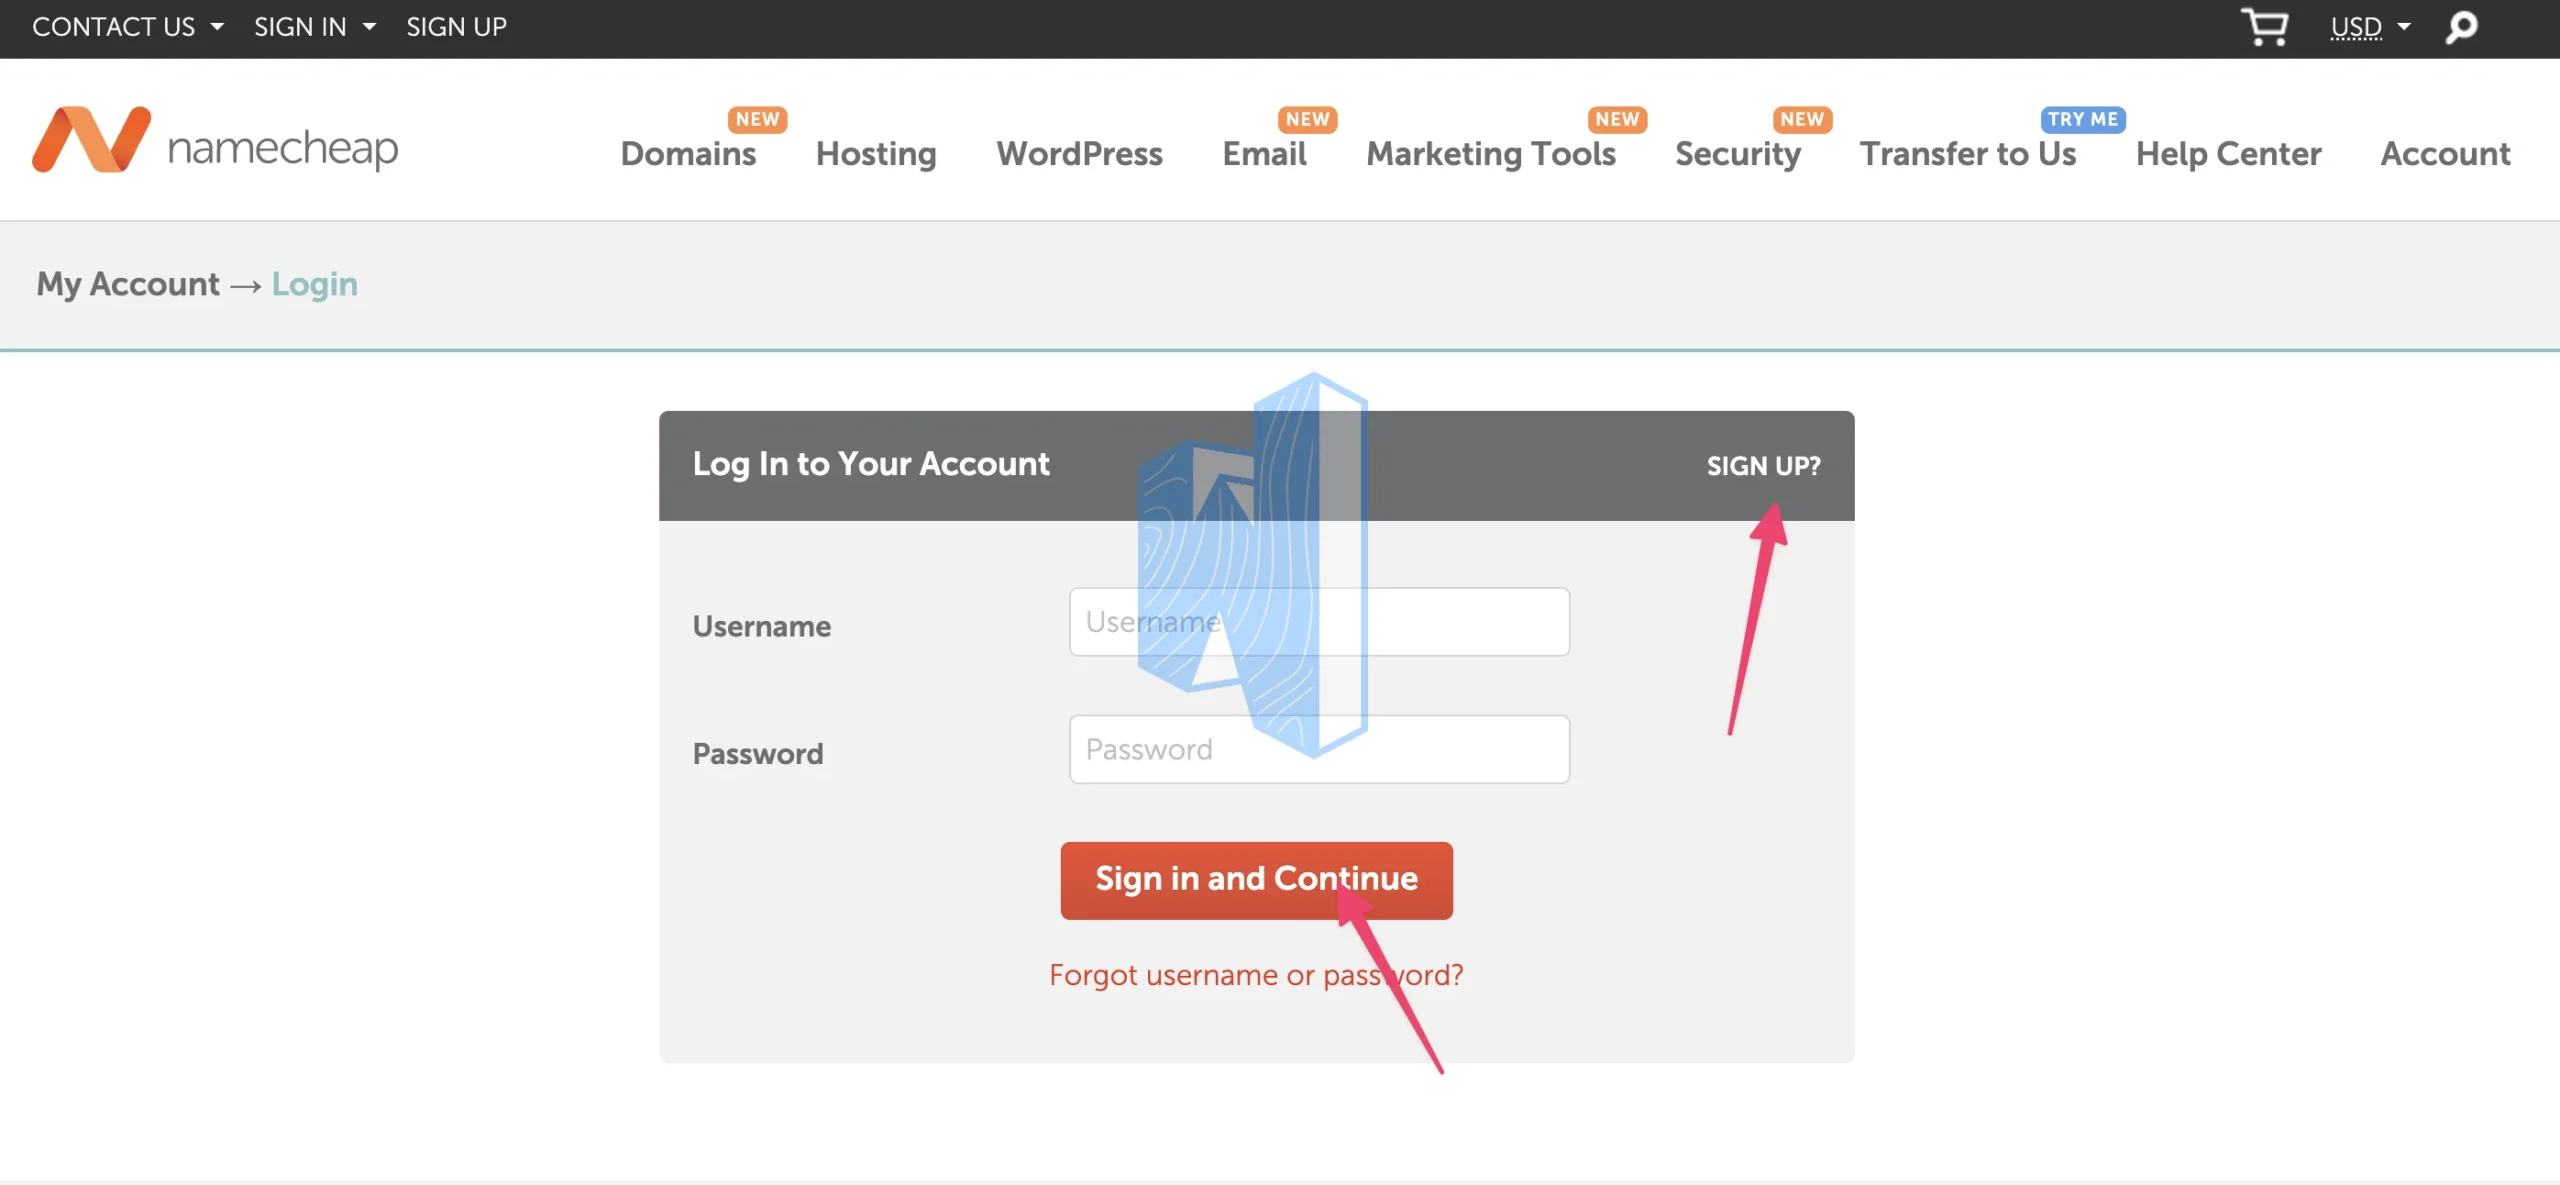
- Already have an account? Enter your details and click “Sign in and Continue.”
- New to Namecheap? Click “Sign Up” to create a new account. Fill in the required information and click “Create Account and Continue.”
After completing this step, you can search for your desired domain.
Search for Your Domain
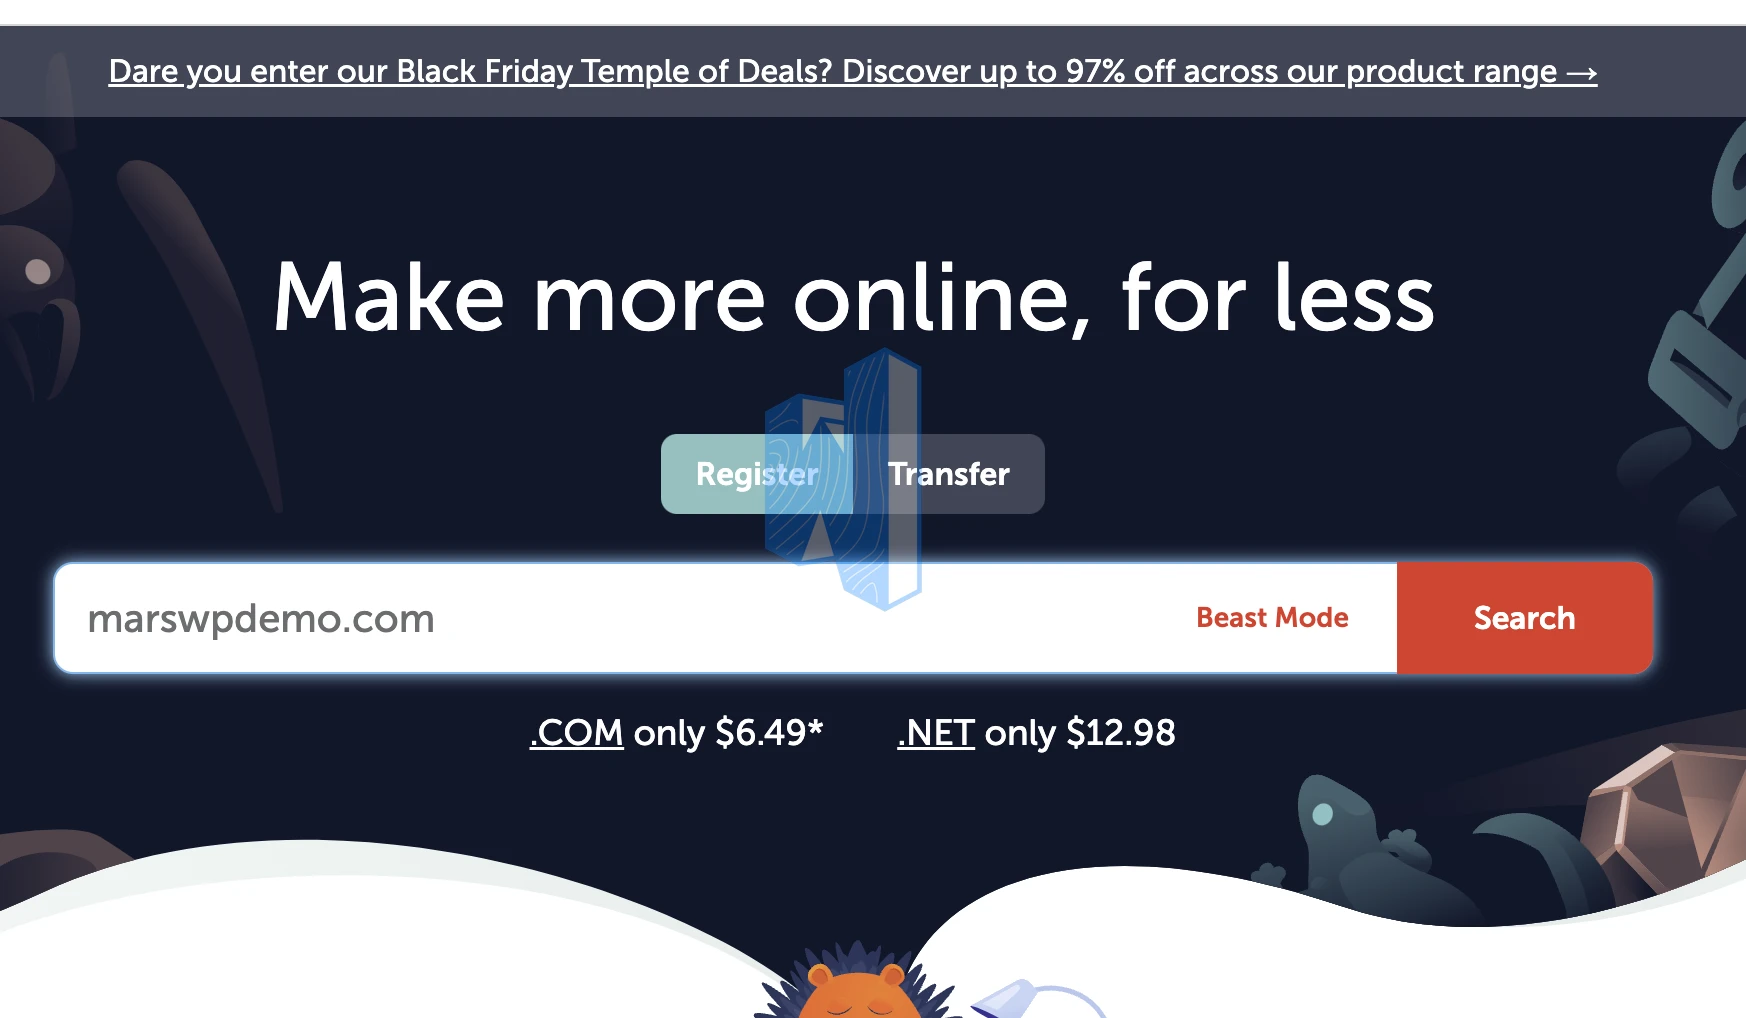
Once logged in, you’ll see a search box on Namecheap’s homepage. Enter your desired domain name and hit “Search.” You’ll see if the domain is available, along with its price.
You’ll see an alert if the domain has already been registered or is being resold at a high price.

If the domain is available, you can register at the listed price or save more using a Namecheap discount code.
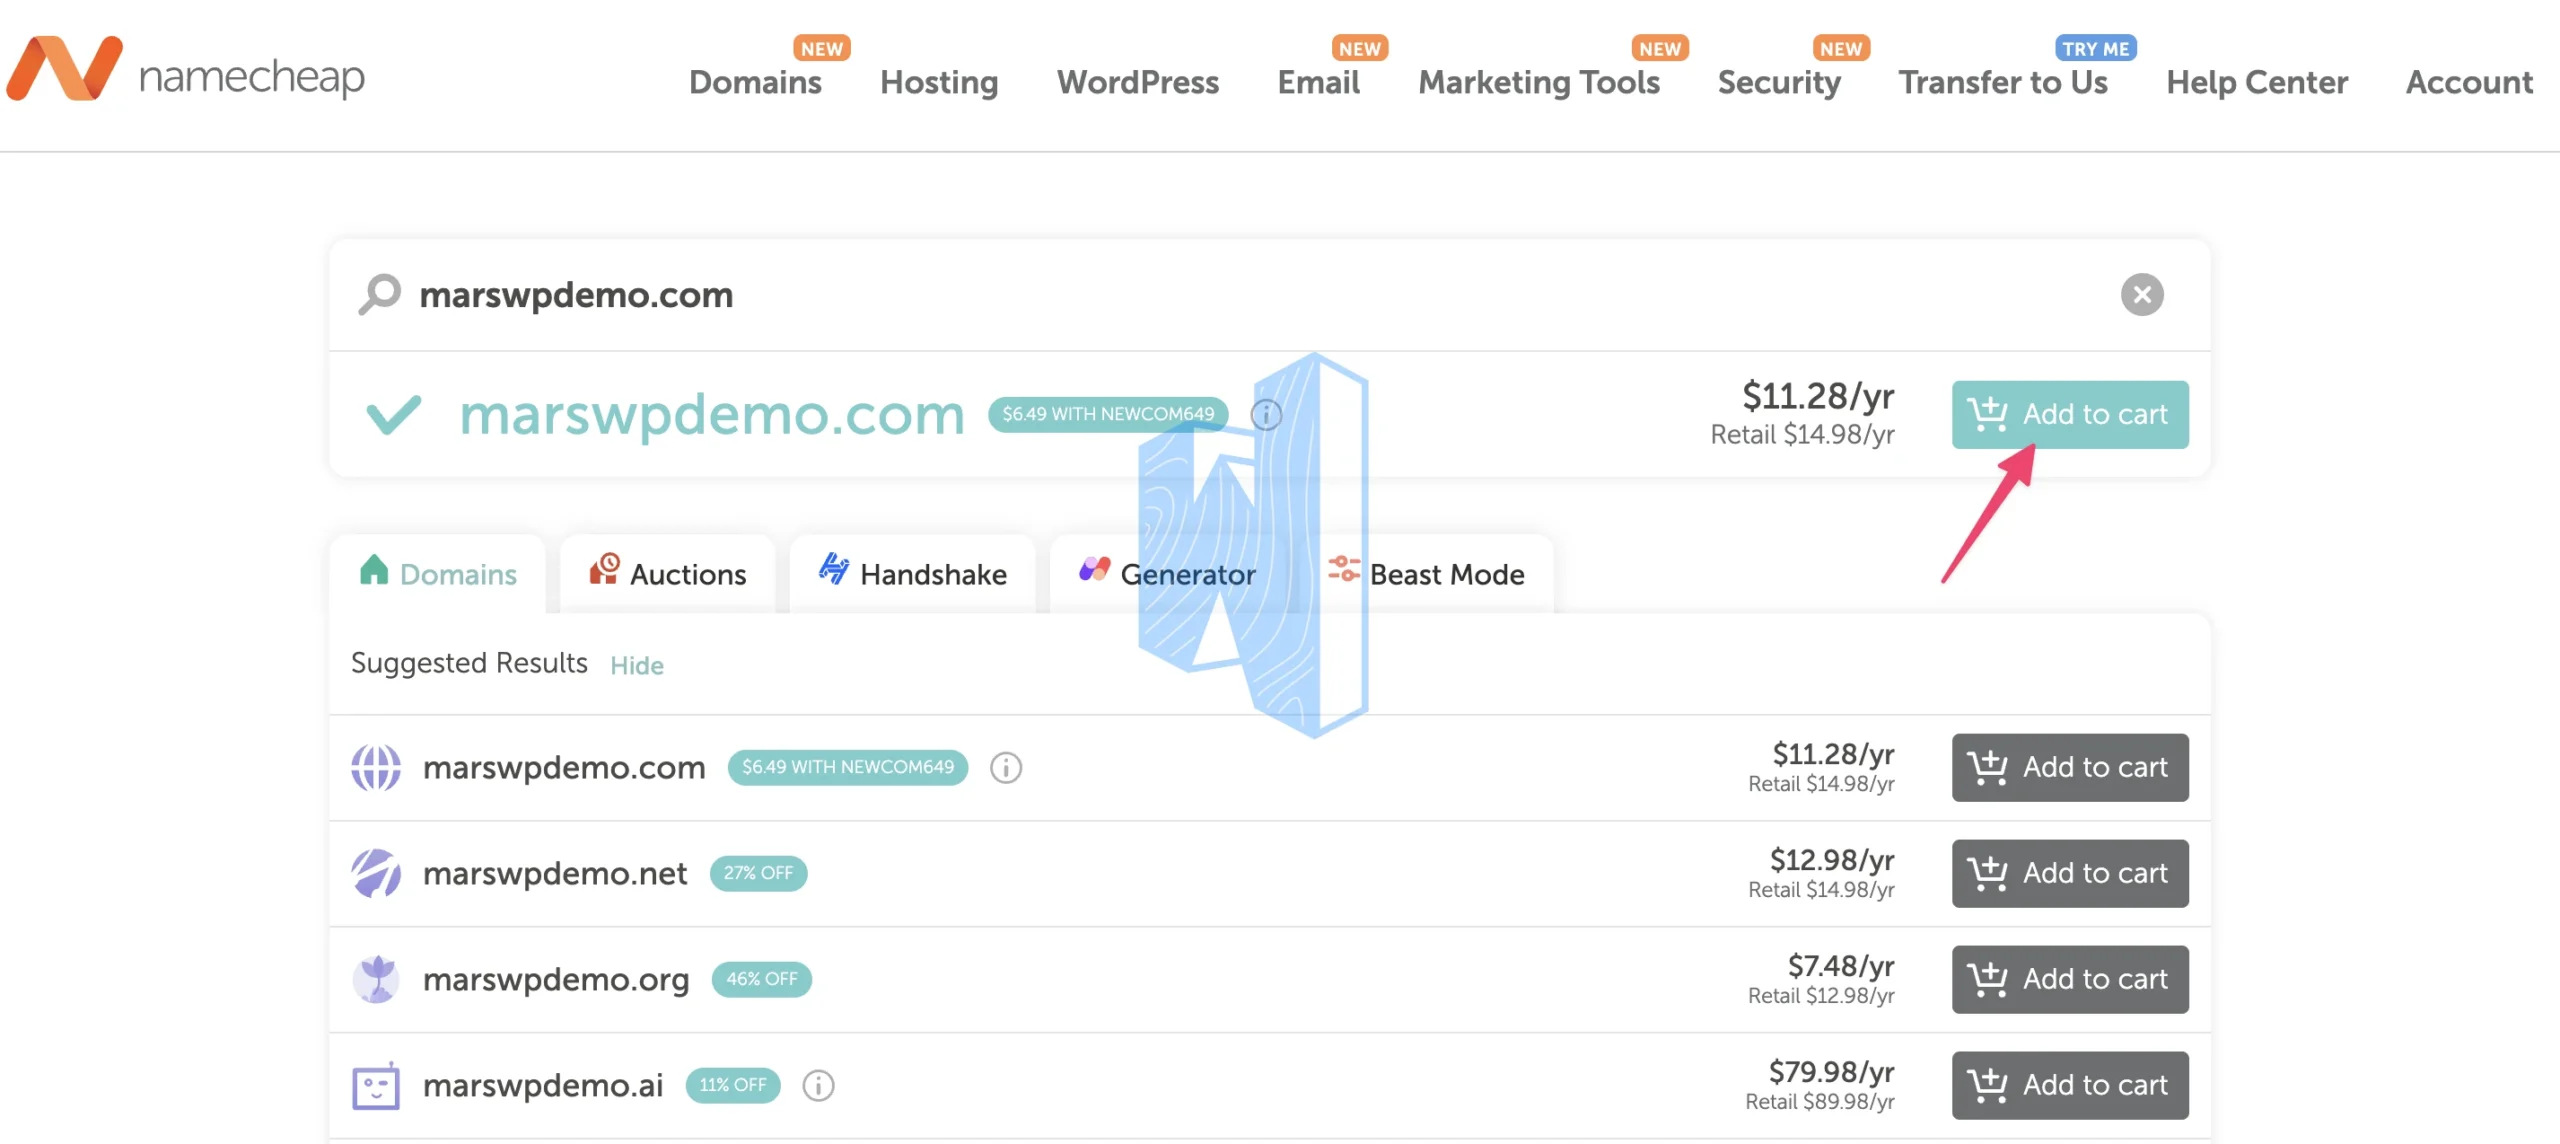
If you proceed, click “Add to Cart” and continue the Checkout process.
Tip: Popular domain extensions like .COM, .NET, and .ORG are commonly used (I personally prefer .COM). If you are building a brand, purchasing multiple extensions to protect your brand from being misused is wise.
Complete the Purchase And Payment
Namecheap will offer additional services after selecting your domain, but you can skip these to save your money.
Click the “Checkout” button to proceed with the purchase.
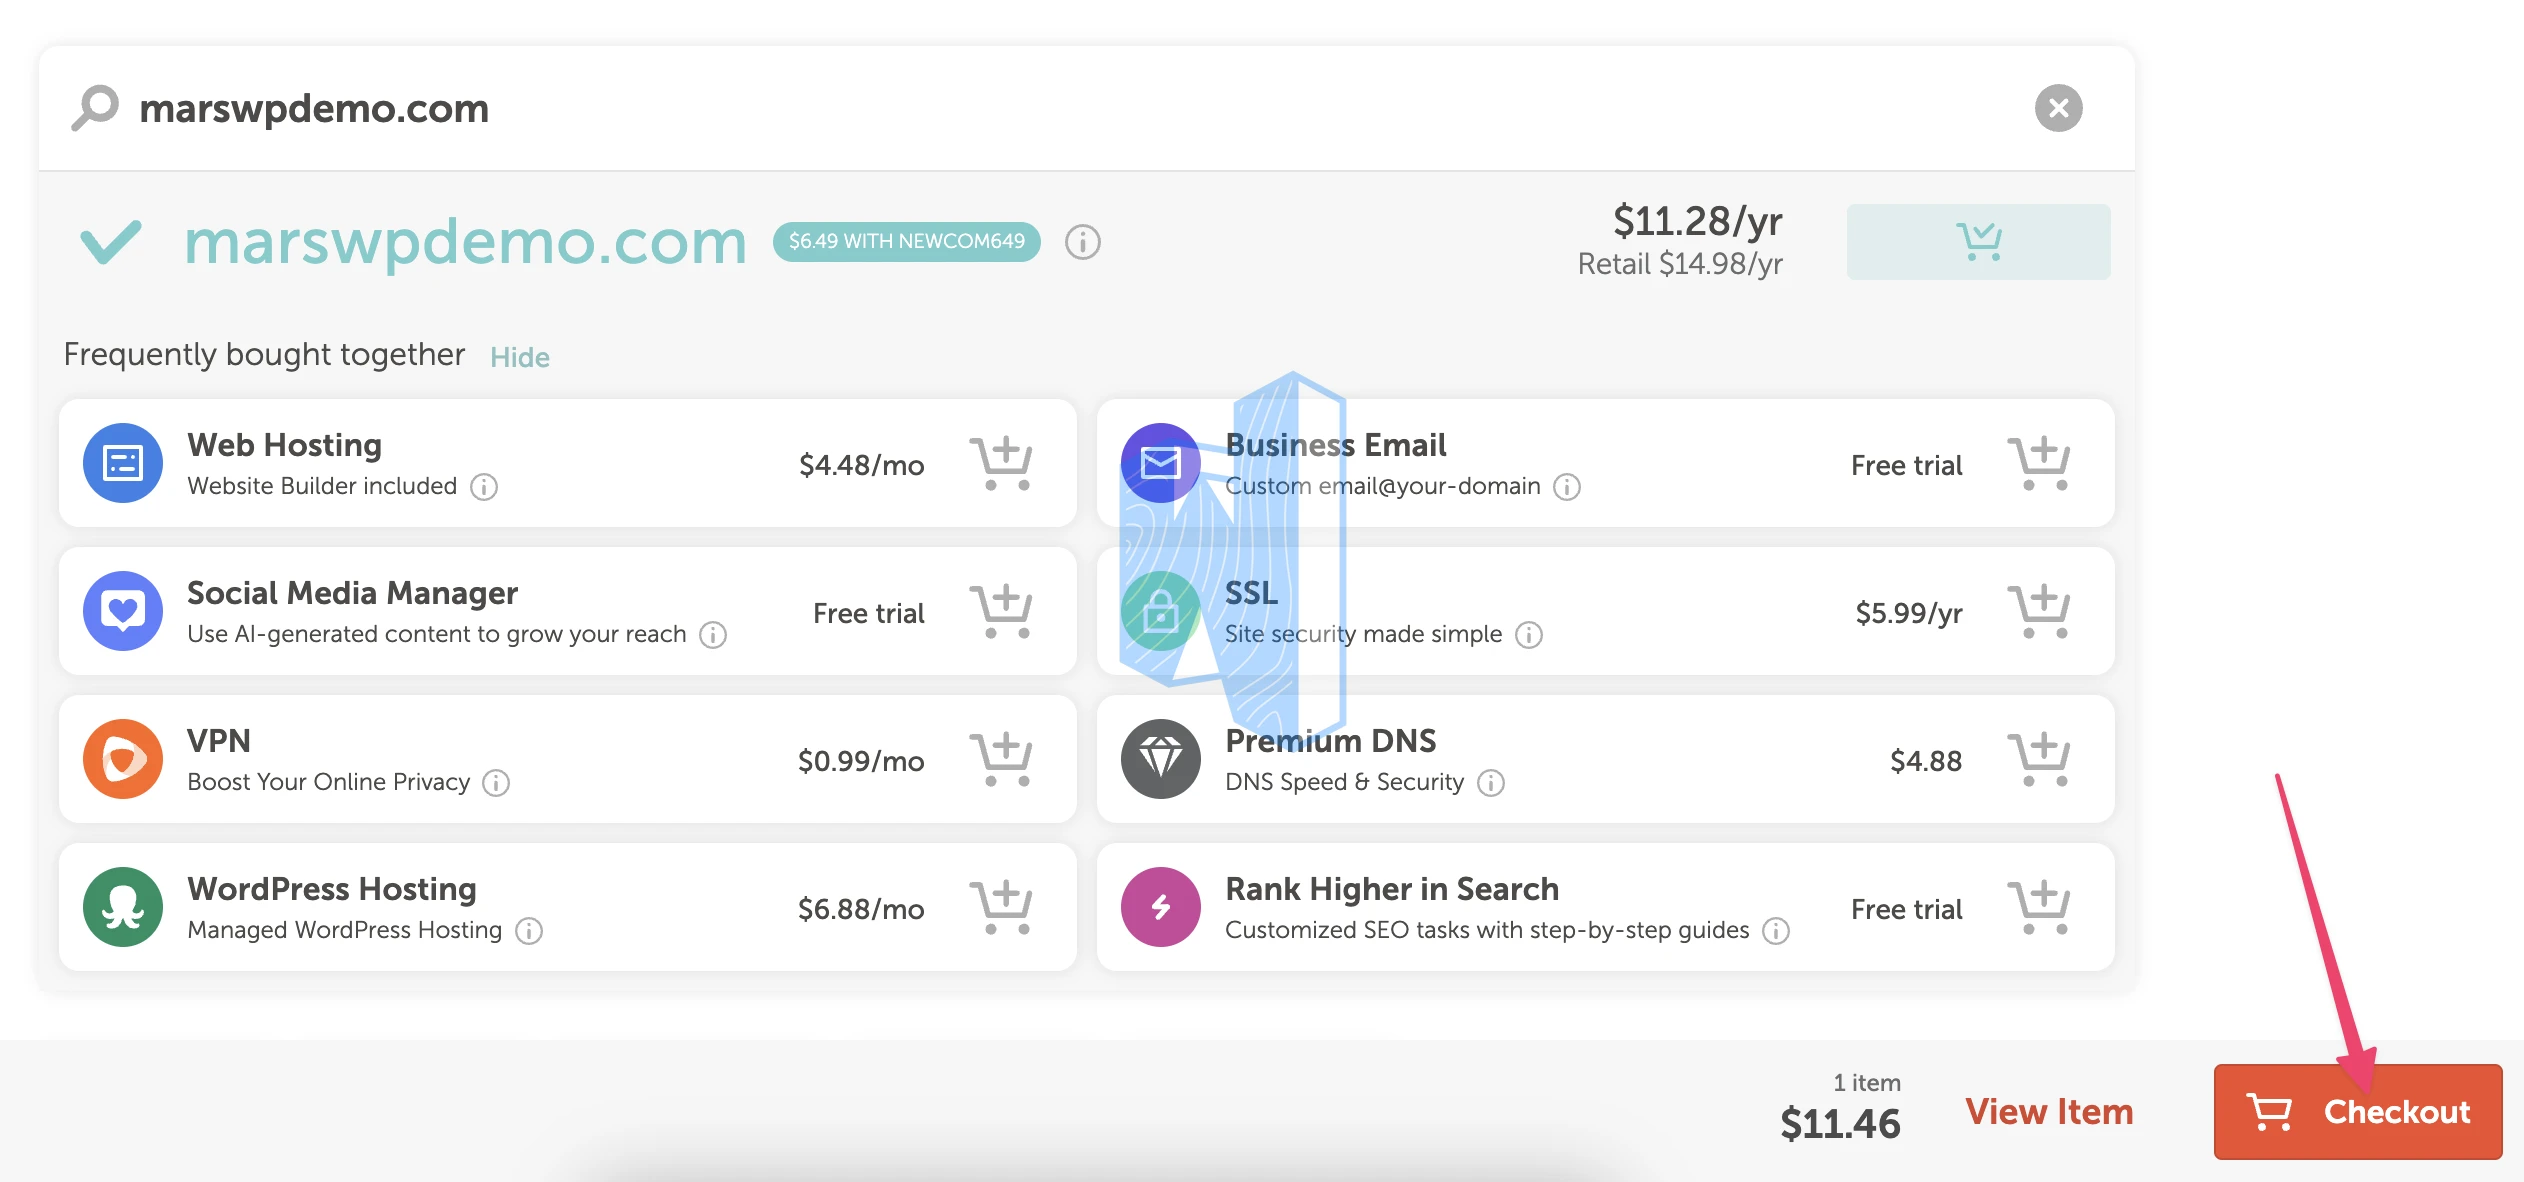
Review your cart details. Pay attention to the two key options:
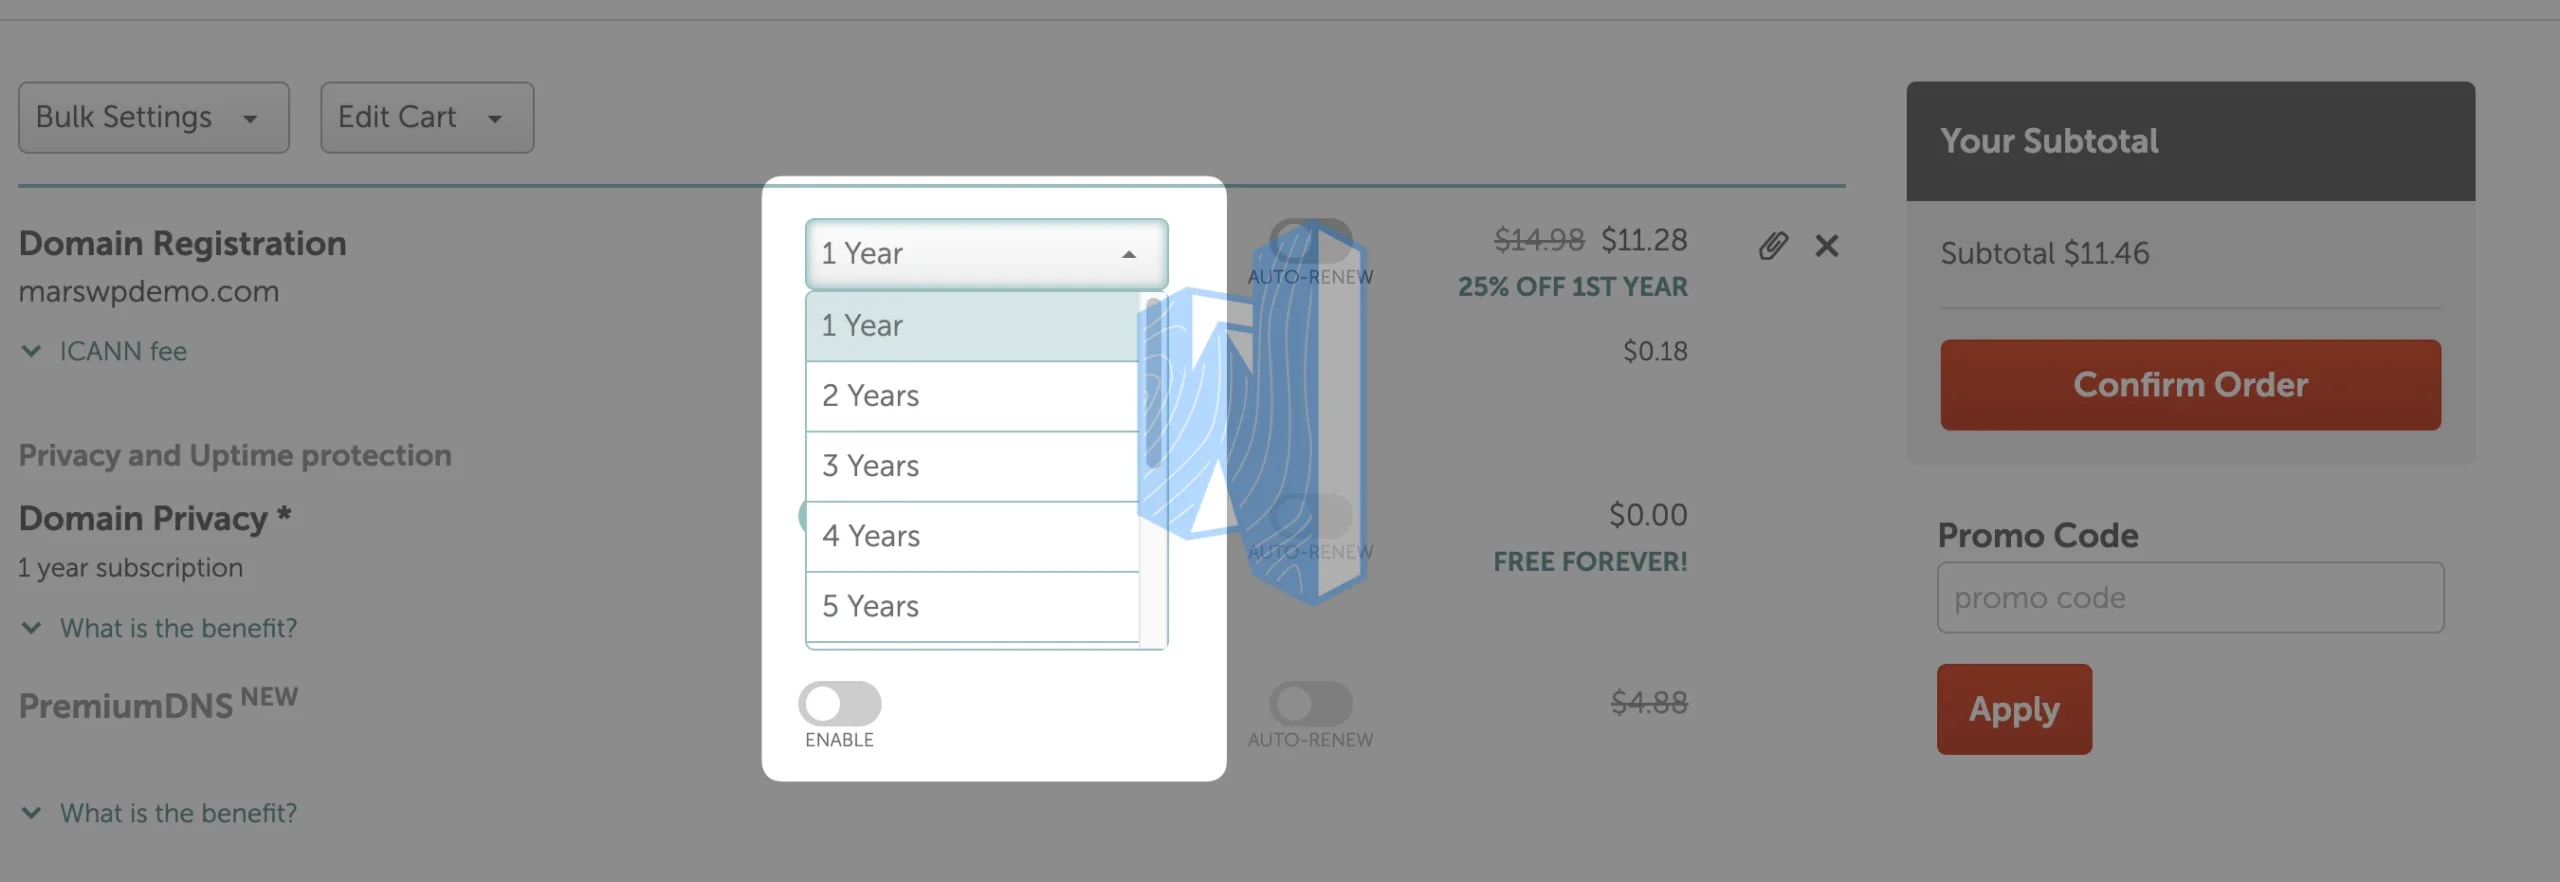
- Number of Years for Registration: Choose 1 or 10 years, depending on your needs. After the registration period ends, you must renew to continue ownership.
- Auto-Renew Option: Namecheap will automatically renew your domain by default to prevent it from expiring. If you don’t wish to auto-renew, you can turn this off.
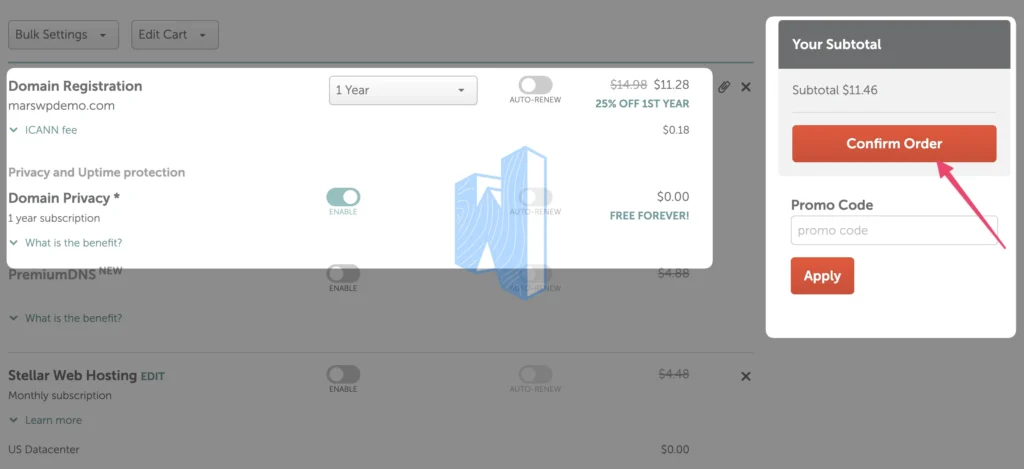
Before finalizing your order, enter your Namecheap promo code to save even more. Click the button below to see all Namecheap coupons from MarsWP.com.
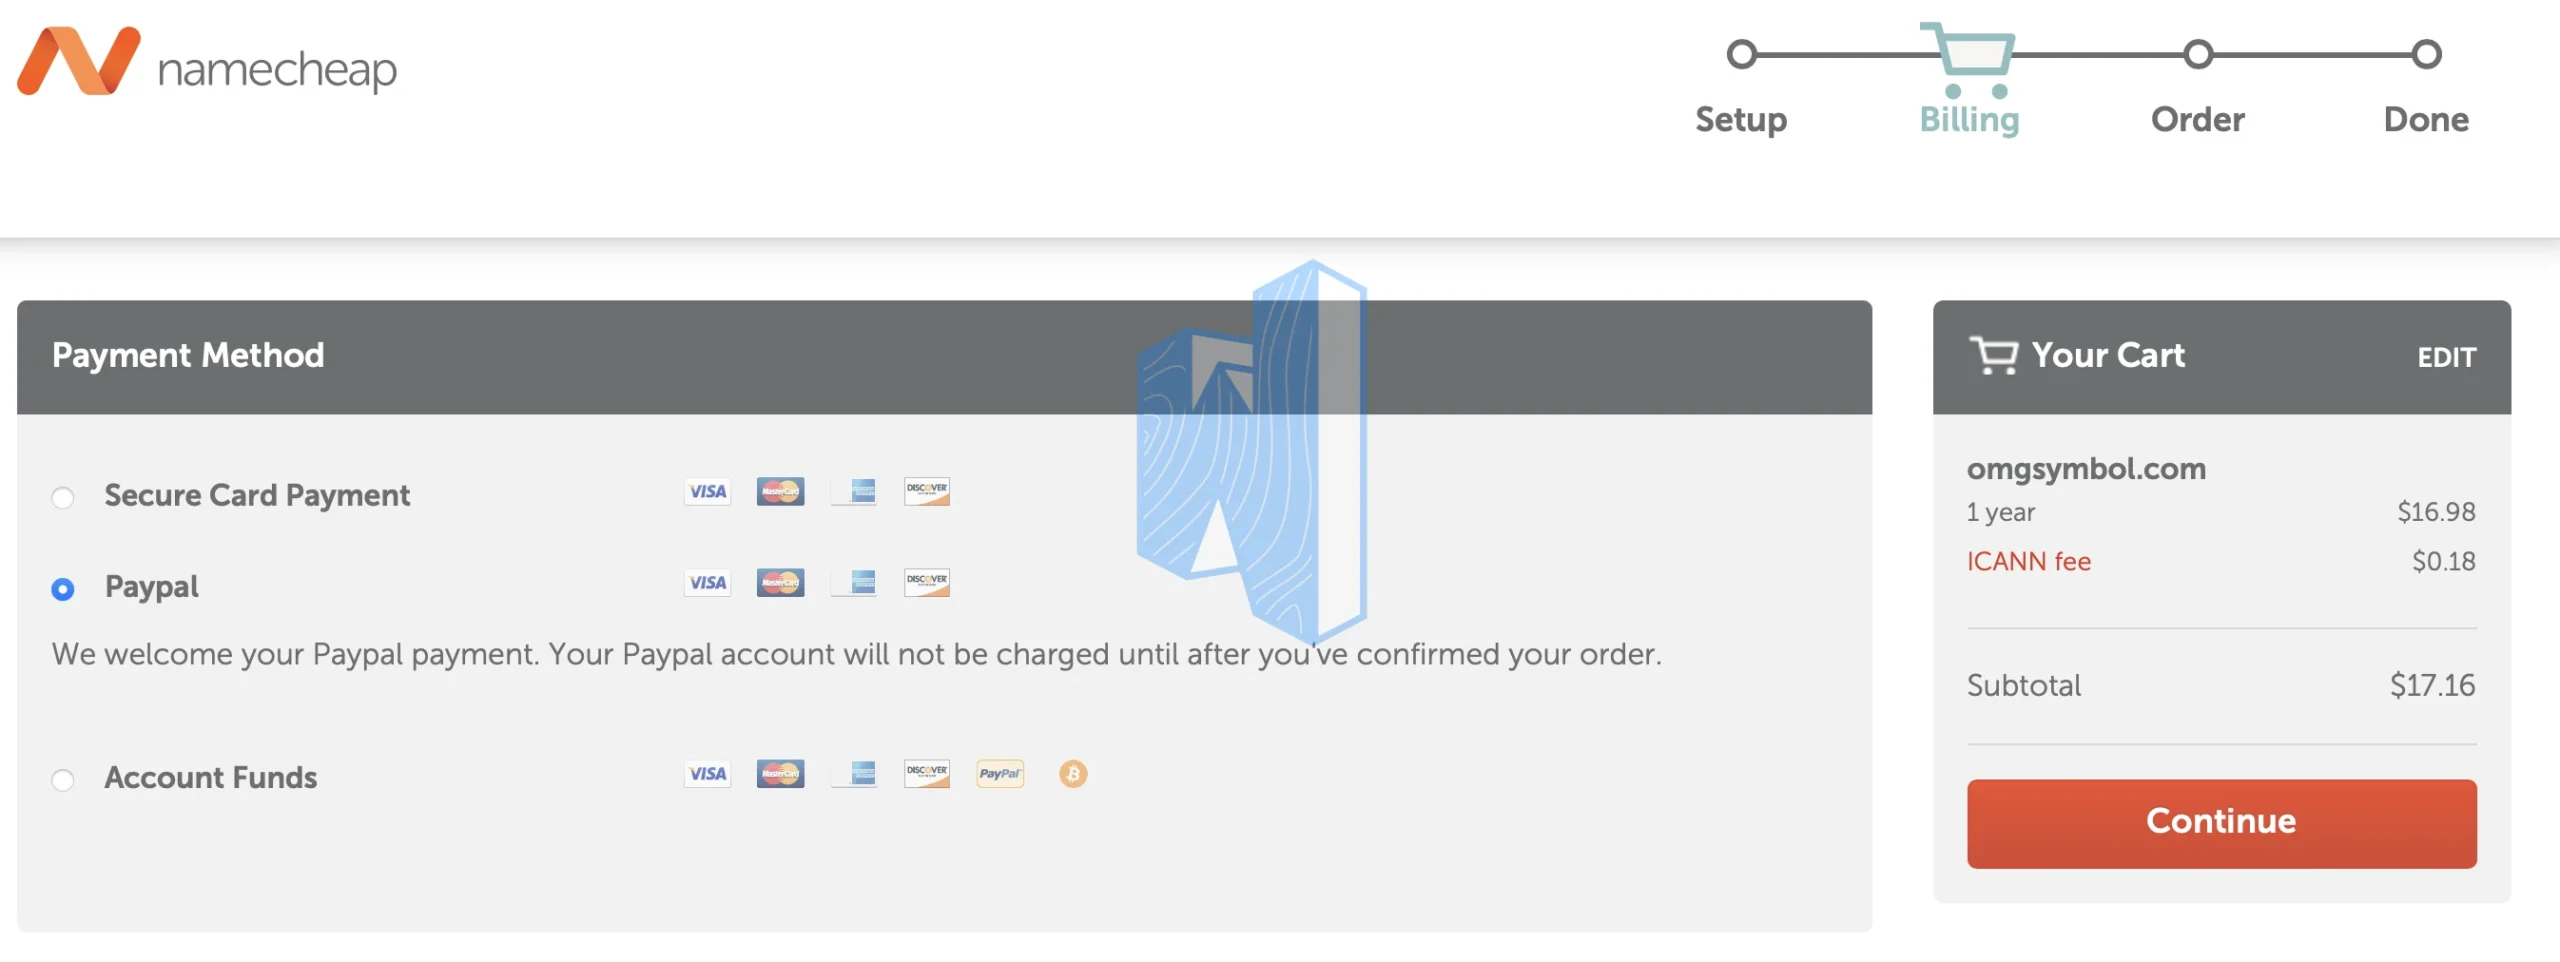
Namecheap supports 3 main payment methods: Secure Card Payment, PayPal, and Account Funds.
Receive Confirmation and Manage Your Domain
Once payment is complete, the system will automatically redirect you back to Namecheap. You will soon see a confirmation that your domain has been successfully registered, and a confirmation email will also be sent to your inbox from Namecheap.
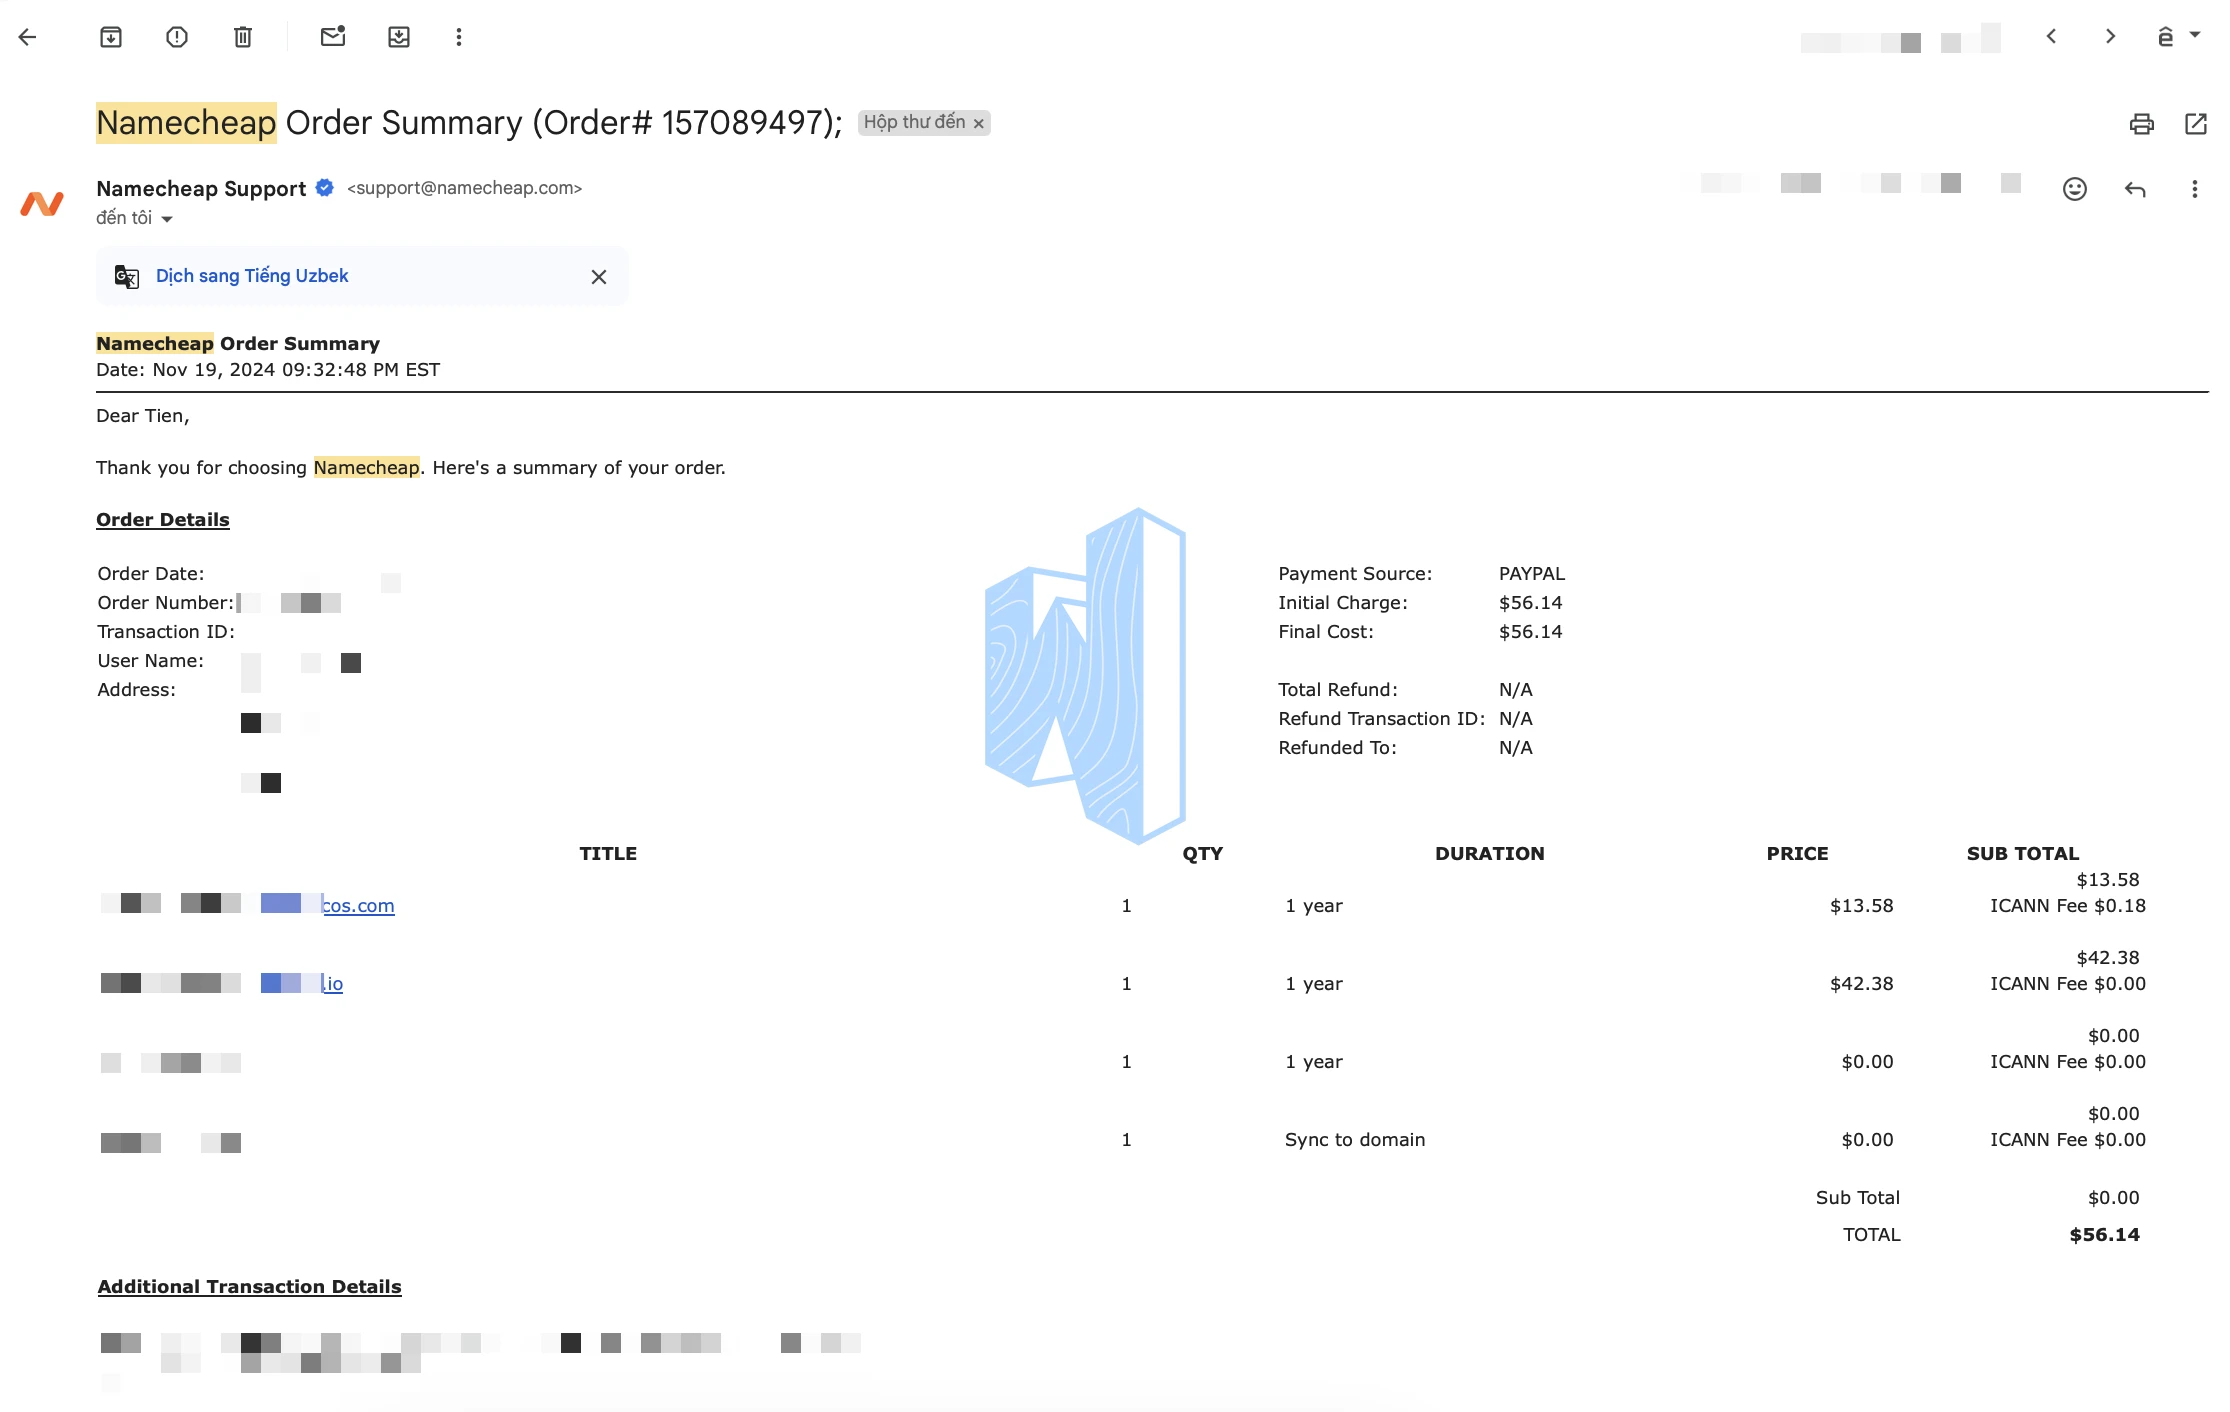
This email will include key details about your domain registration, such as your domain name, order number, transaction ID, and more.
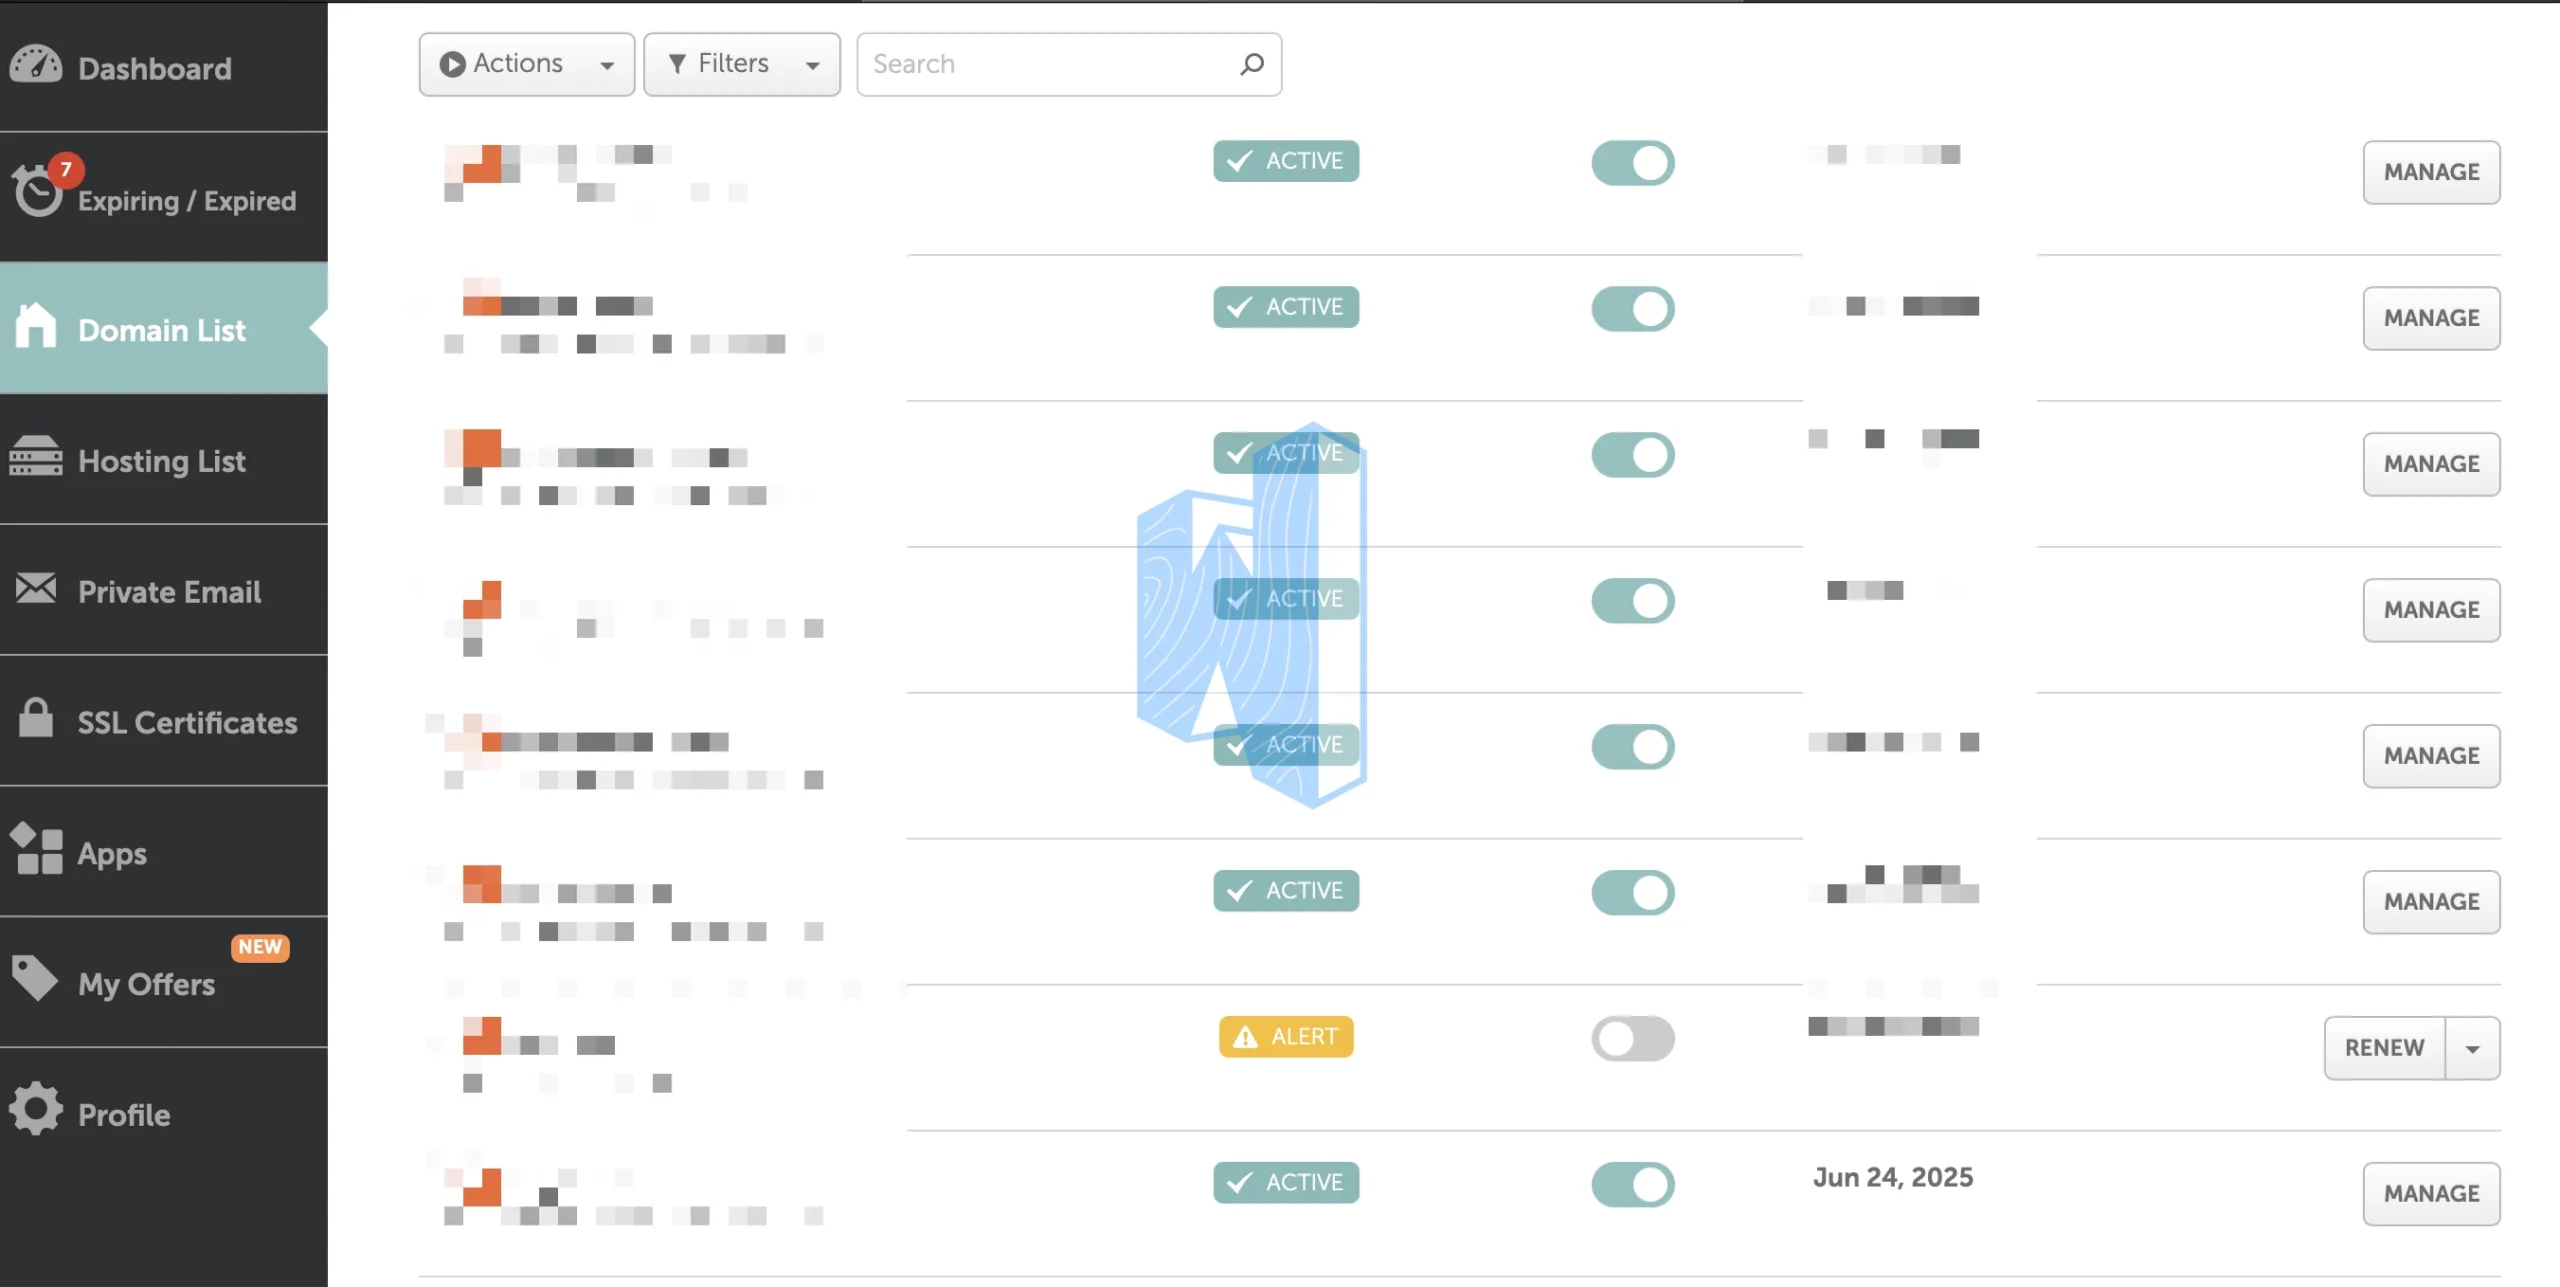
You can now manage your domain by clicking “Manage” or navigating to Account → Dashboard → Domain List.
And there you have it! 🎉 Congratulations on successfully registering your domain name with Namecheap! 👏


