Connecting a domain to web hosting is the first step to launching a website. It links your domain name to your hosting service, making your site accessible online.
This guide uses NameCheap (domain) and HawkHost (hosting) as examples, but the process is similar across providers. Let’s explore the steps.

My Experience:
Through 7 years of experience in web development, I’ve found that connect a domain to hosting via IP address (Method 2) is the most efficient approach.
This method offers greater flexibility, especially when incorporating advanced features like subdomains, custom domain-based emails, or CDN services as your website evolves.
Method 1: Connecting a Domain to Hosting via NameServers
Step 1: Retrieve Nameservers from Hawkhost
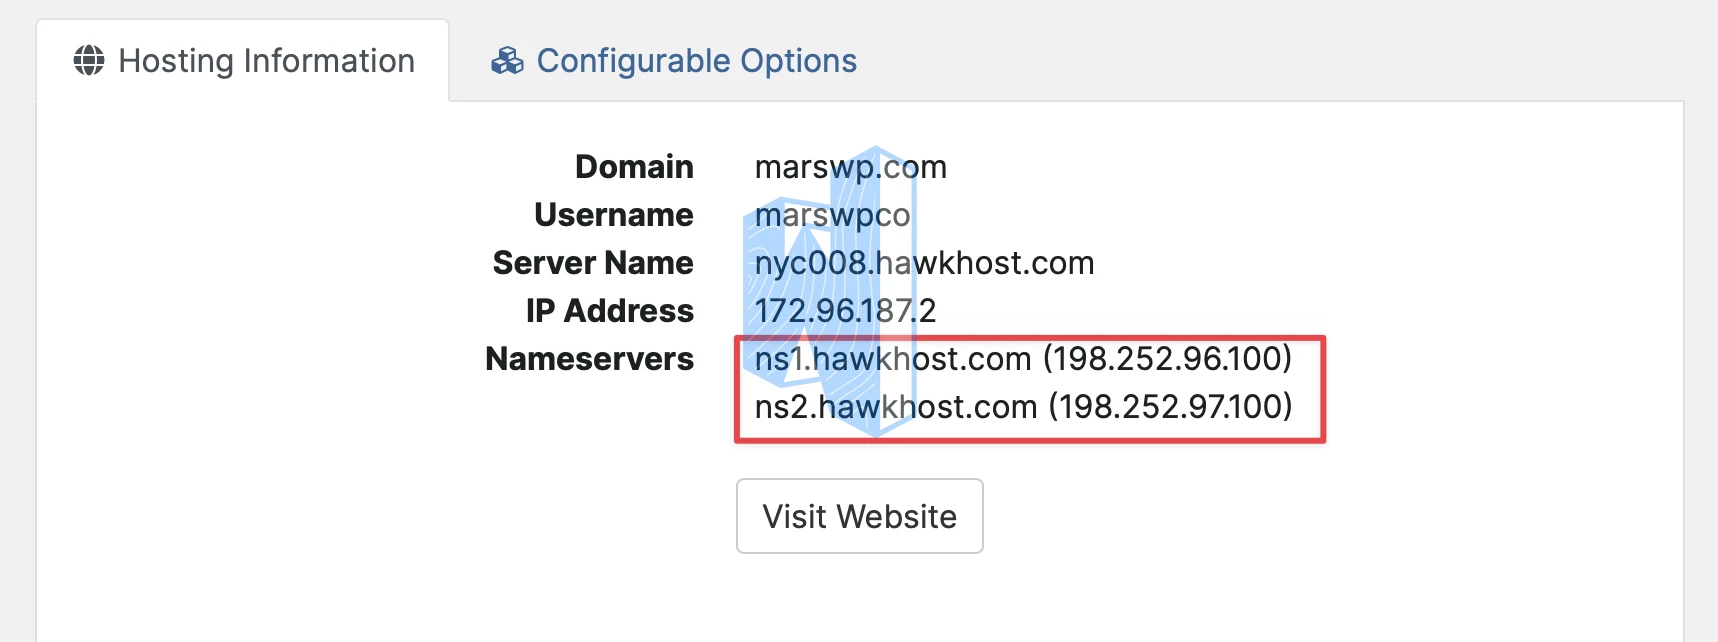
1. Log in to your Hawkhost account. Navigate to Services > Active.
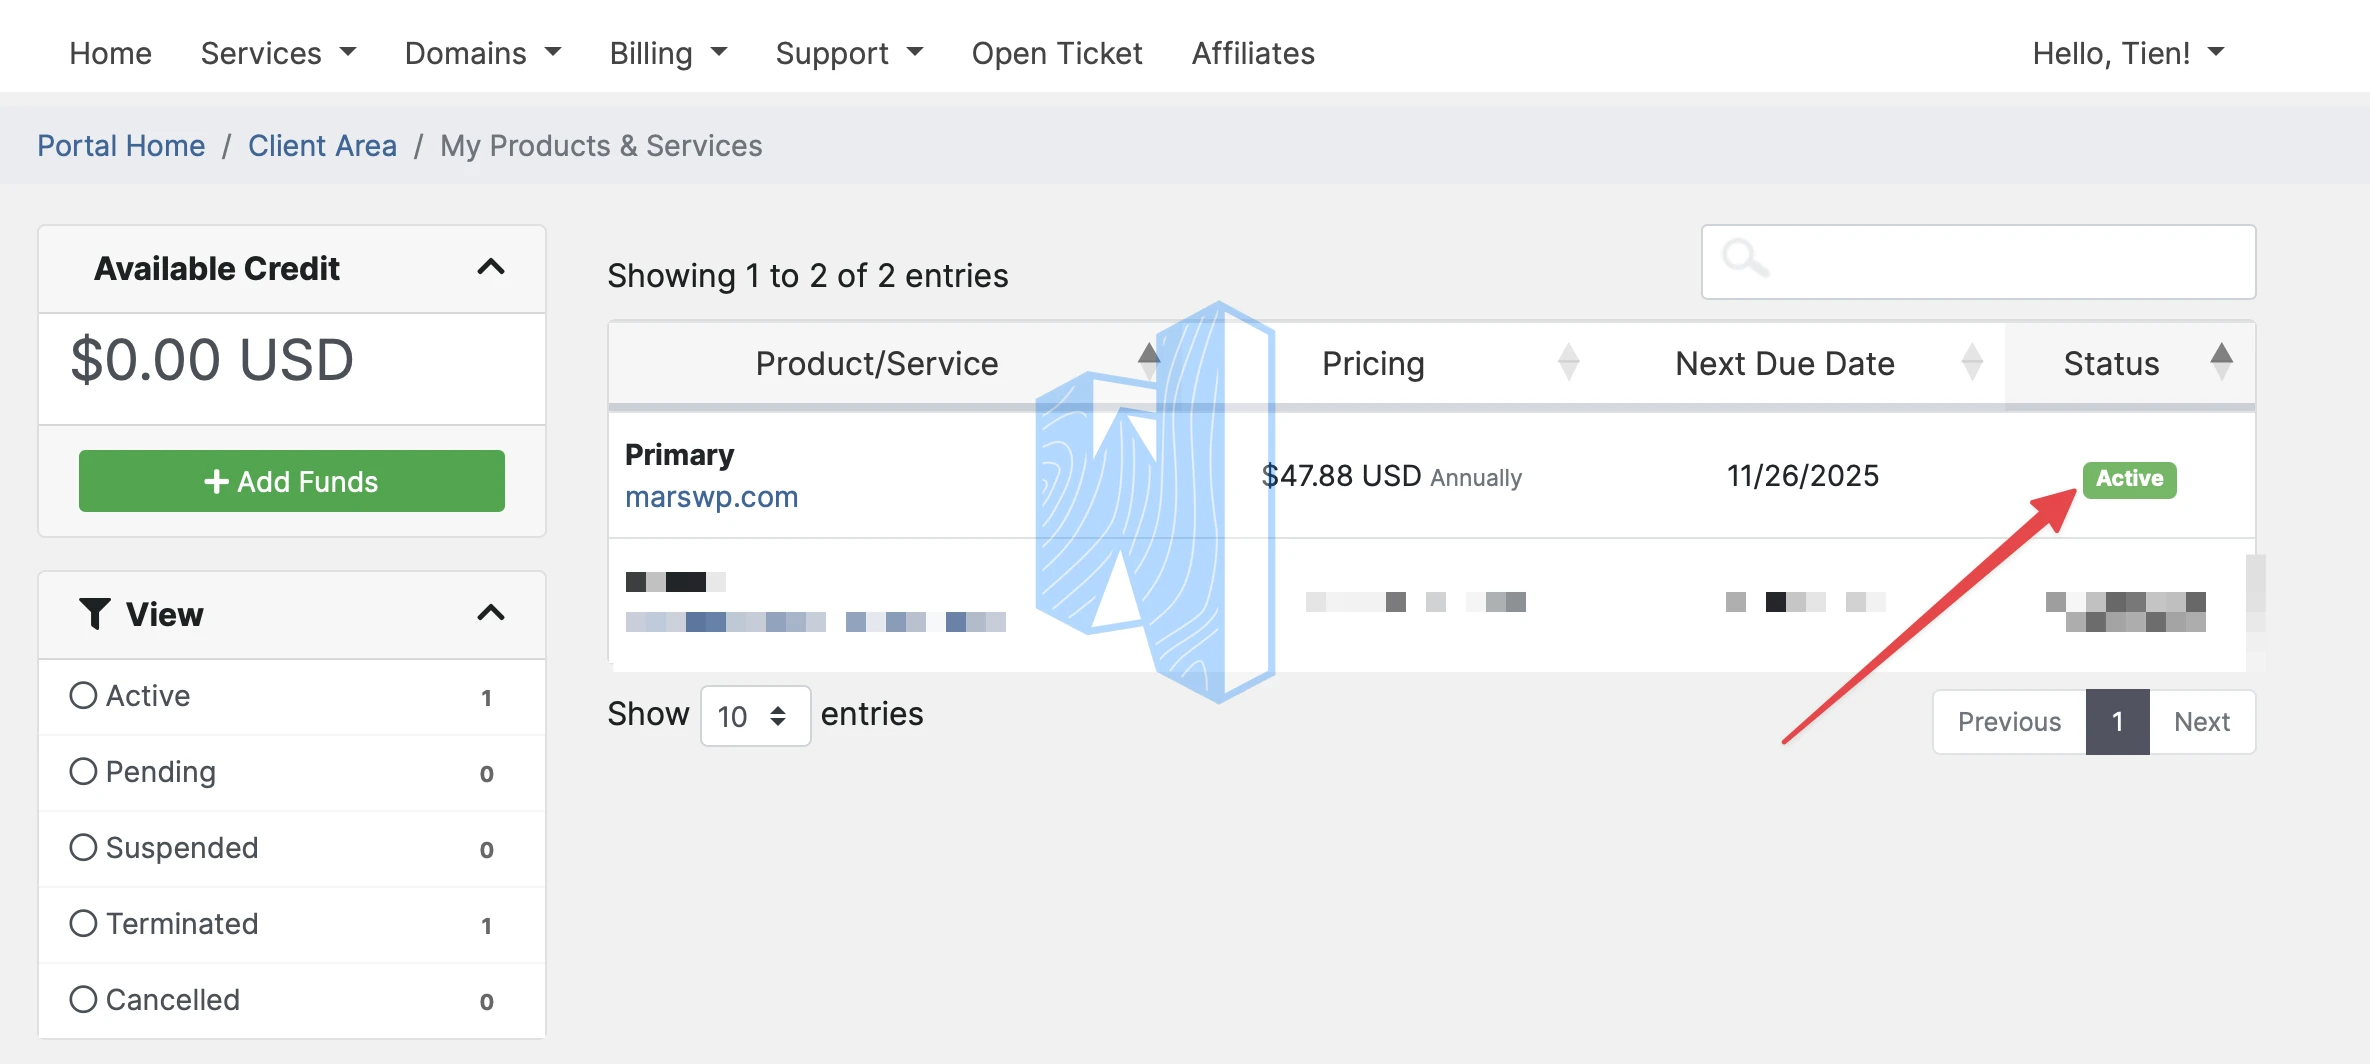
Under Manage Product, locate the nameservers. They typically appear as two lines of text containing characters and numbers.
Step 2: Update Nameservers in Namecheap
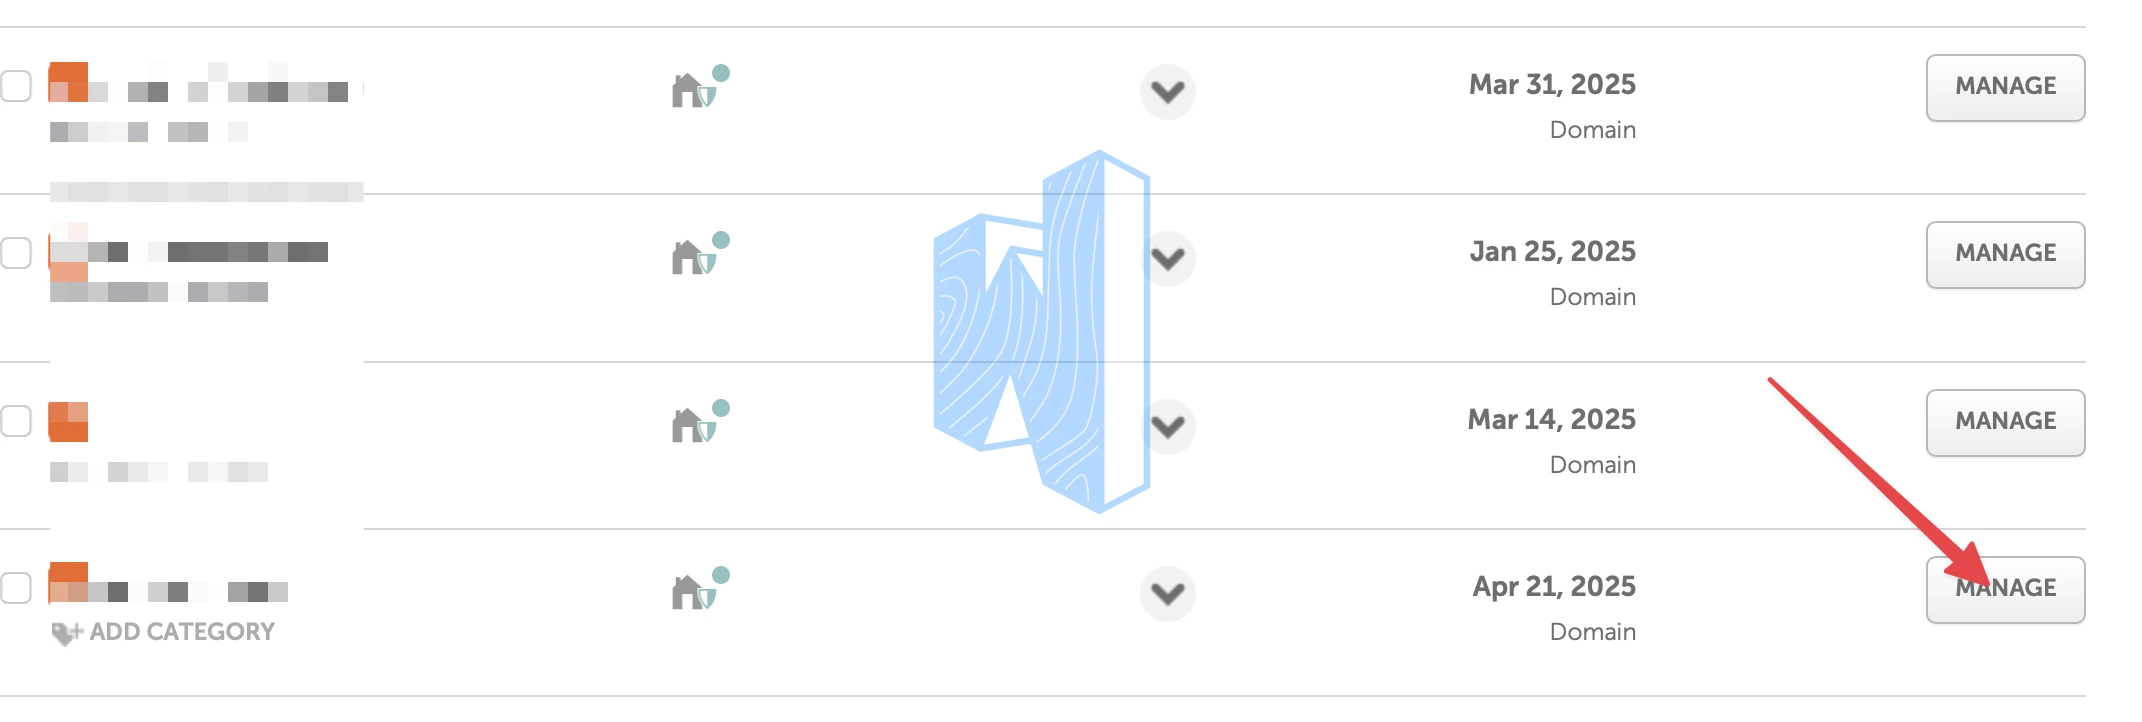
1. Log in to your Namecheap account and access the Dashboard >> Domain List.

2. Select the domain you want to connect and click Manage.
3. Under the Nameservers section, choose Custom DNS.

Enter the nameservers from Hawkhost in the designated fields.
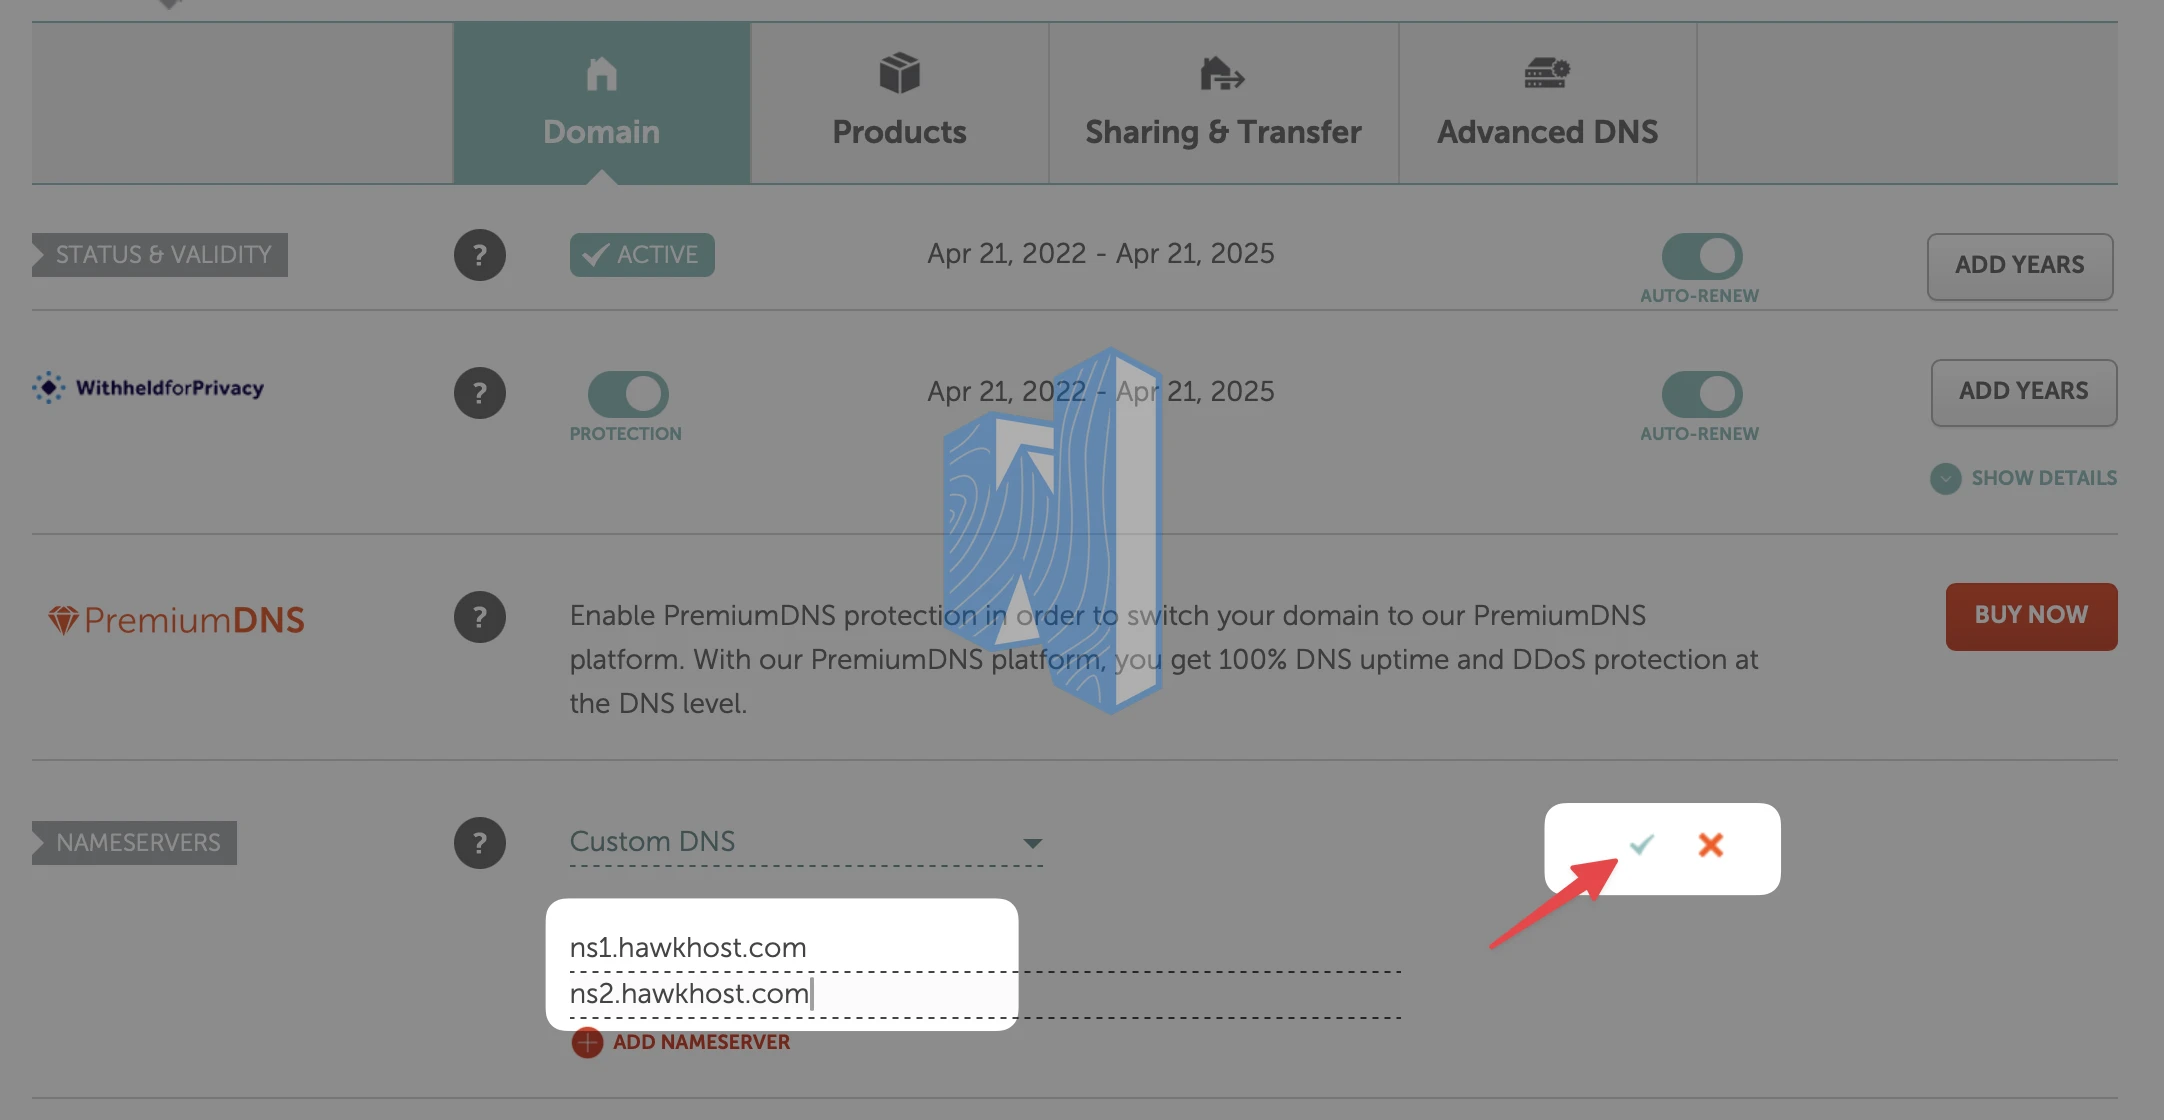
Save your changes by clicking the Tick icon.
Note: DNS propagation can take between a few minutes to 48 hours. During this period, your website may be inaccessible.
Method 2: Connecting a Domain to Hosting via IP Address
Step 1: Obtain the IP Address from Hawkhost
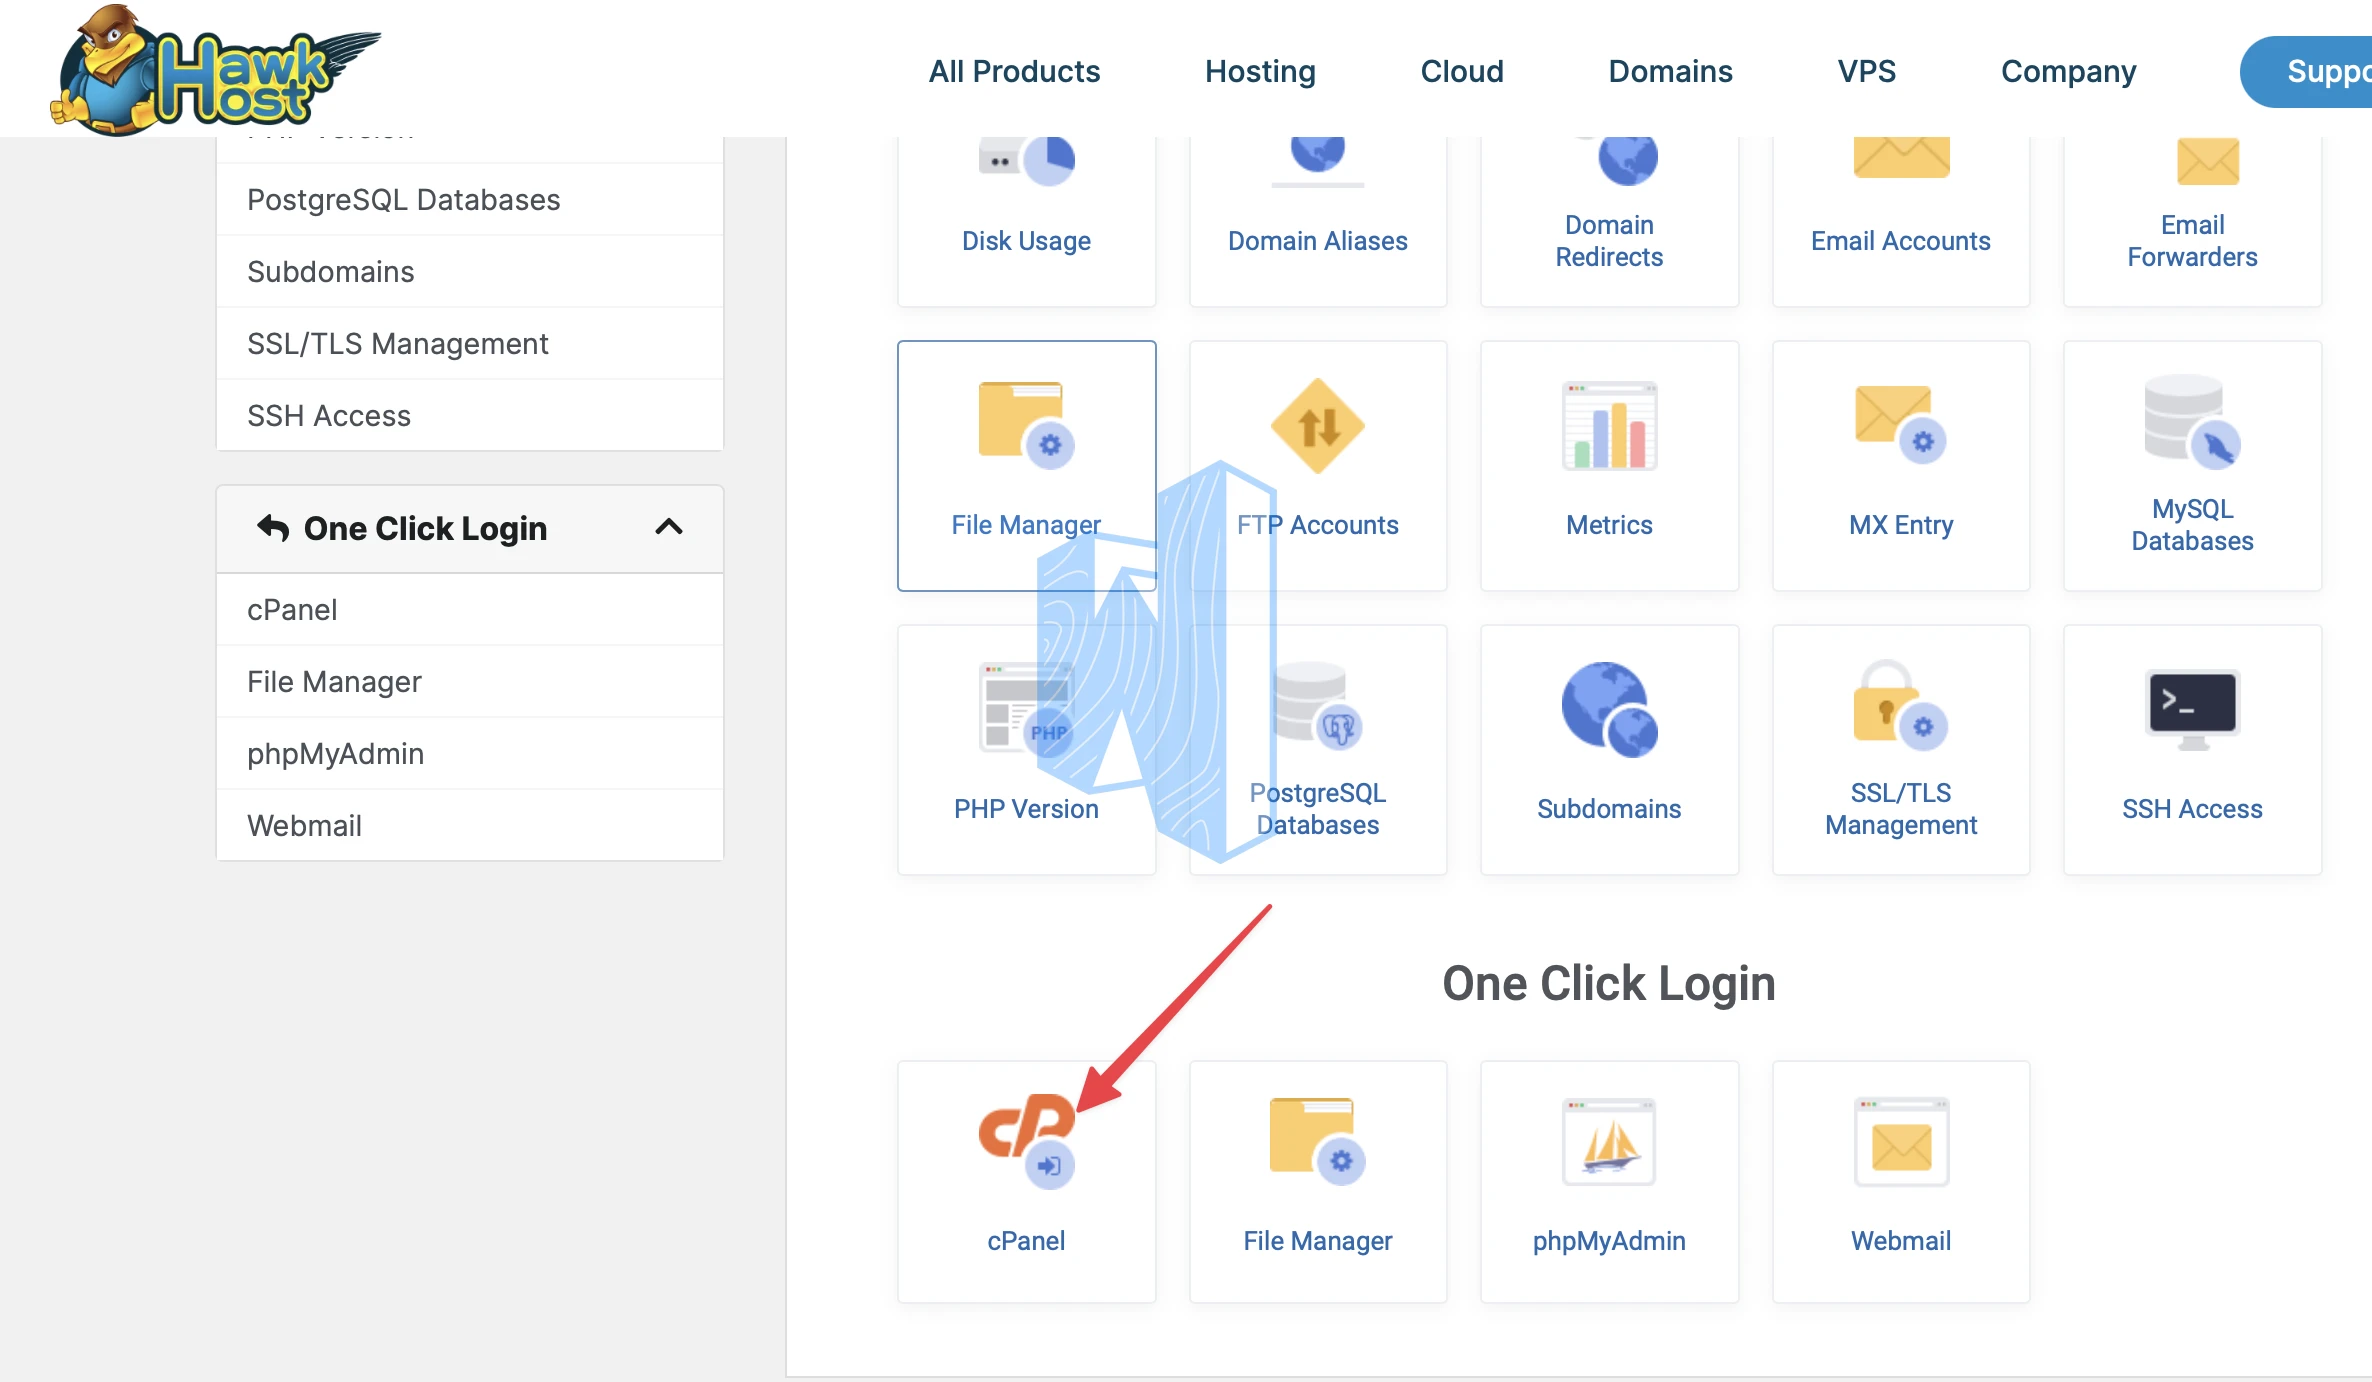
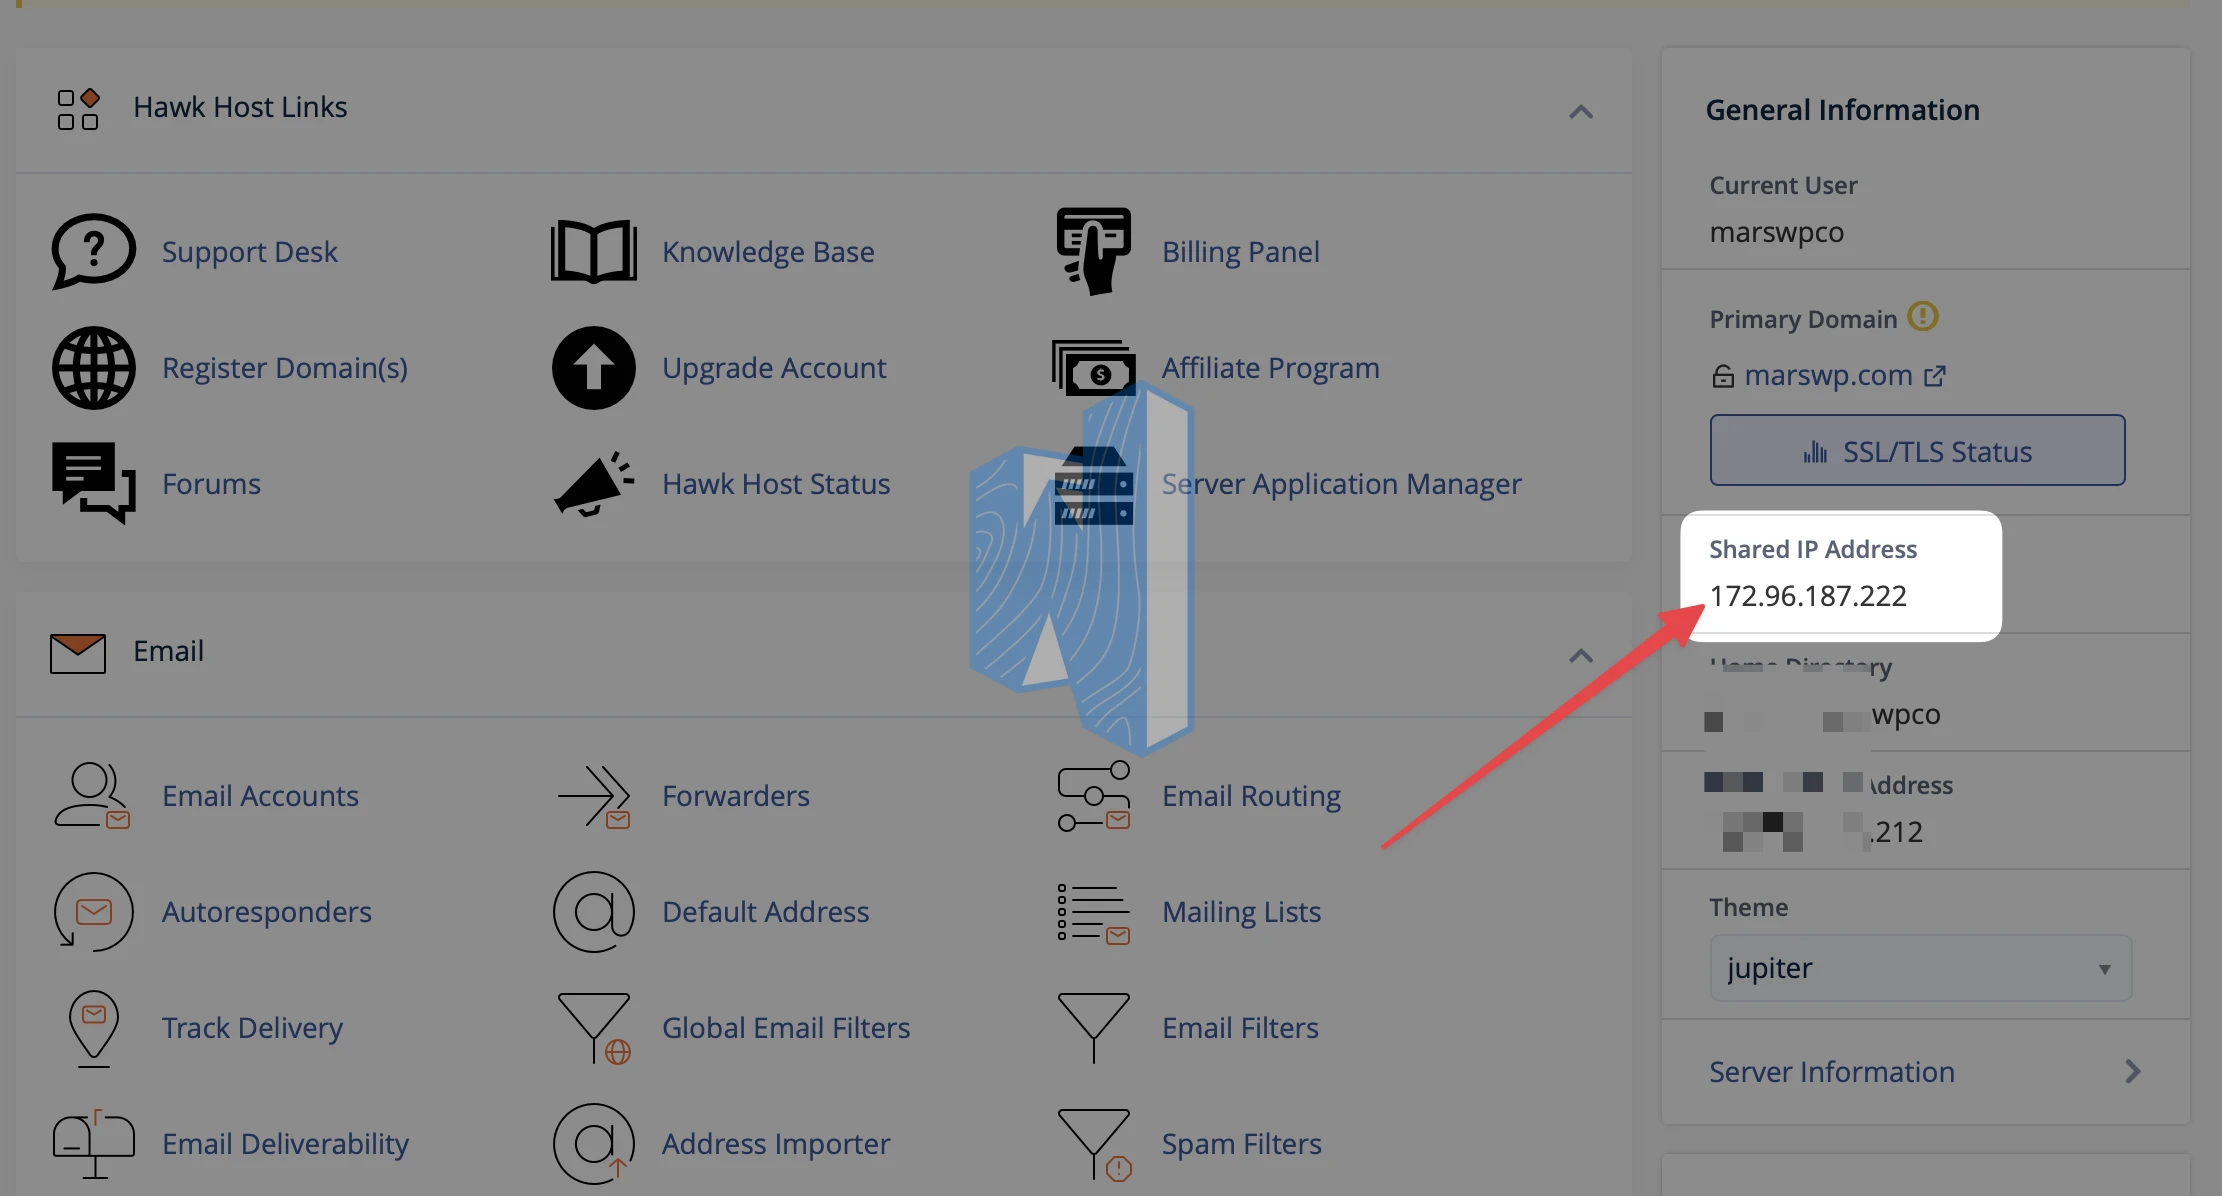
1. Log in to Hawkhost and access the control panel (cPanel).
2. In the General Information section, locate the Shared IP Address— this is the IP address you’ll use.
Step 2: Update DNS Records in Namecheap
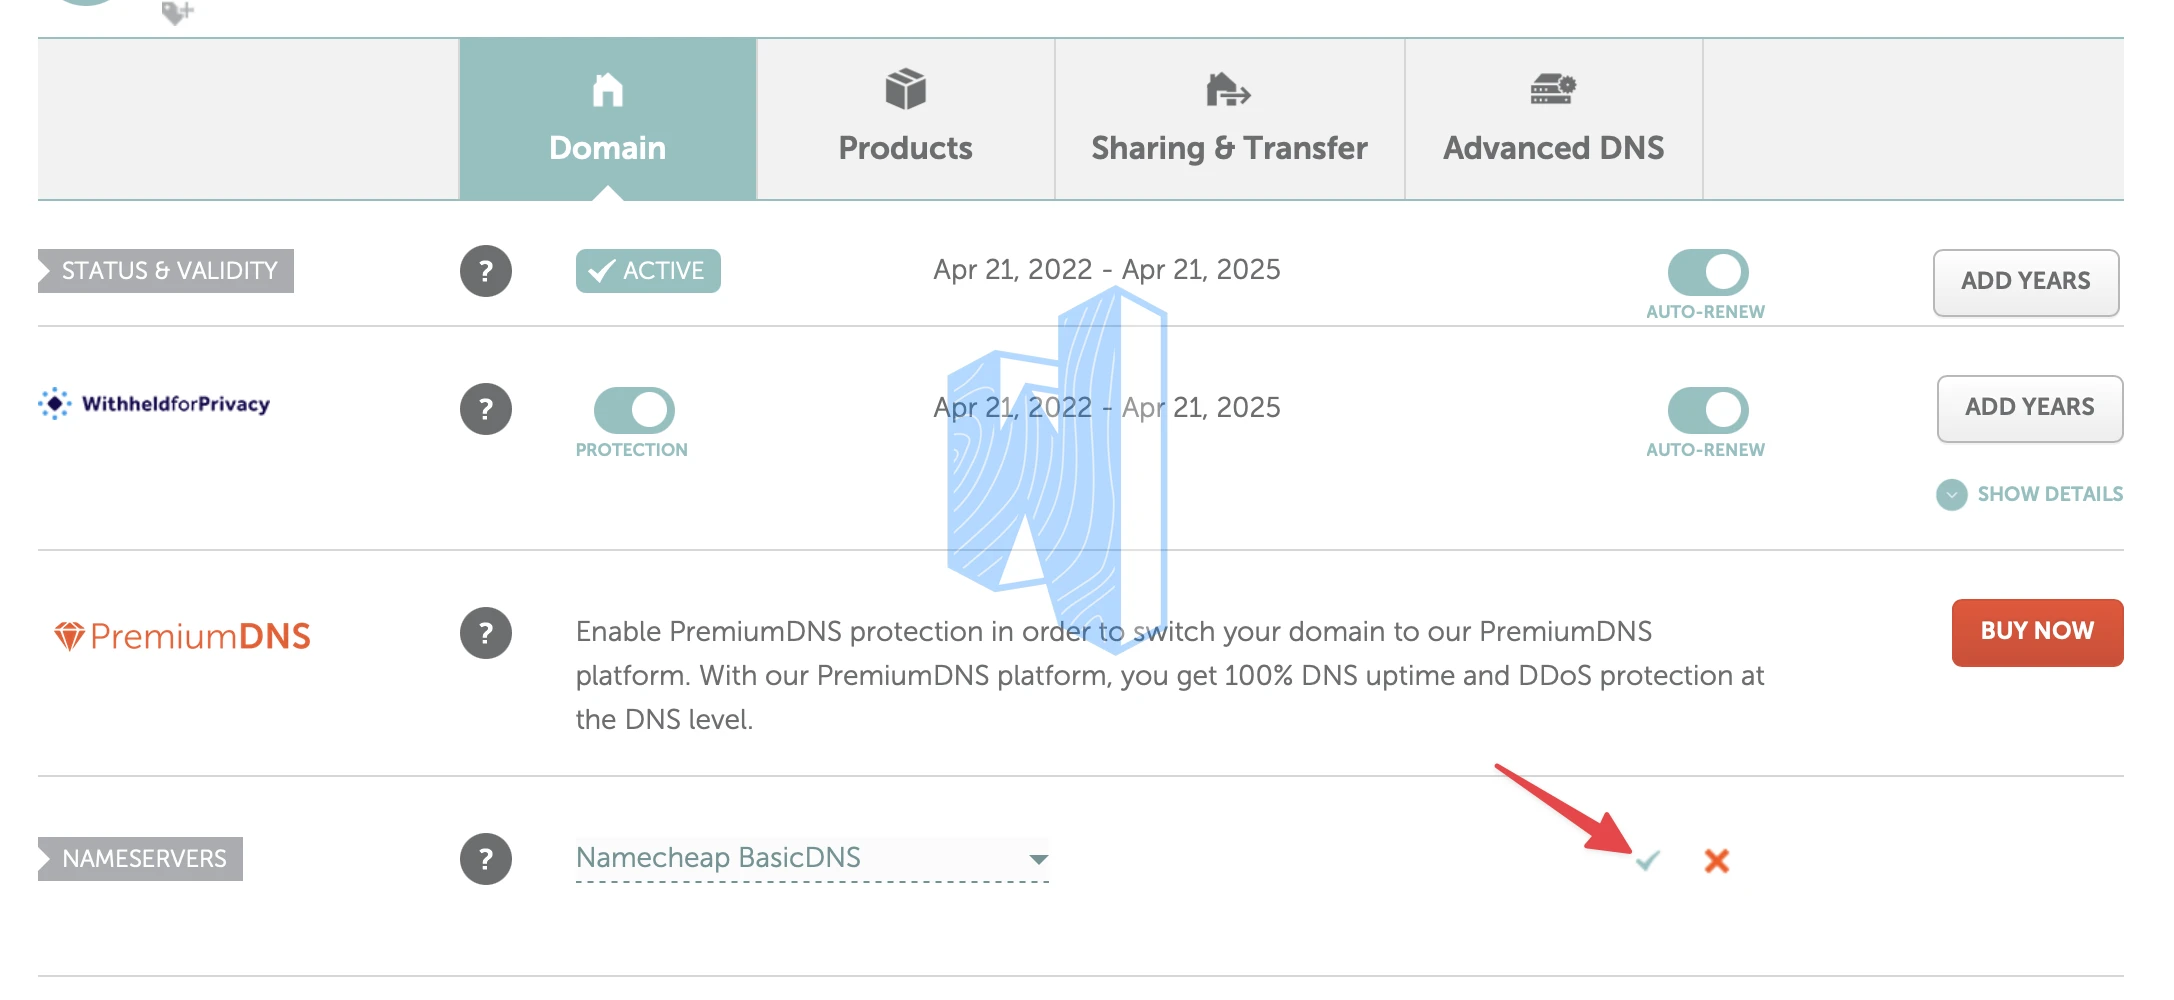
1. In your Namecheap account, select the domain to be connected and go to Advanced DNS.
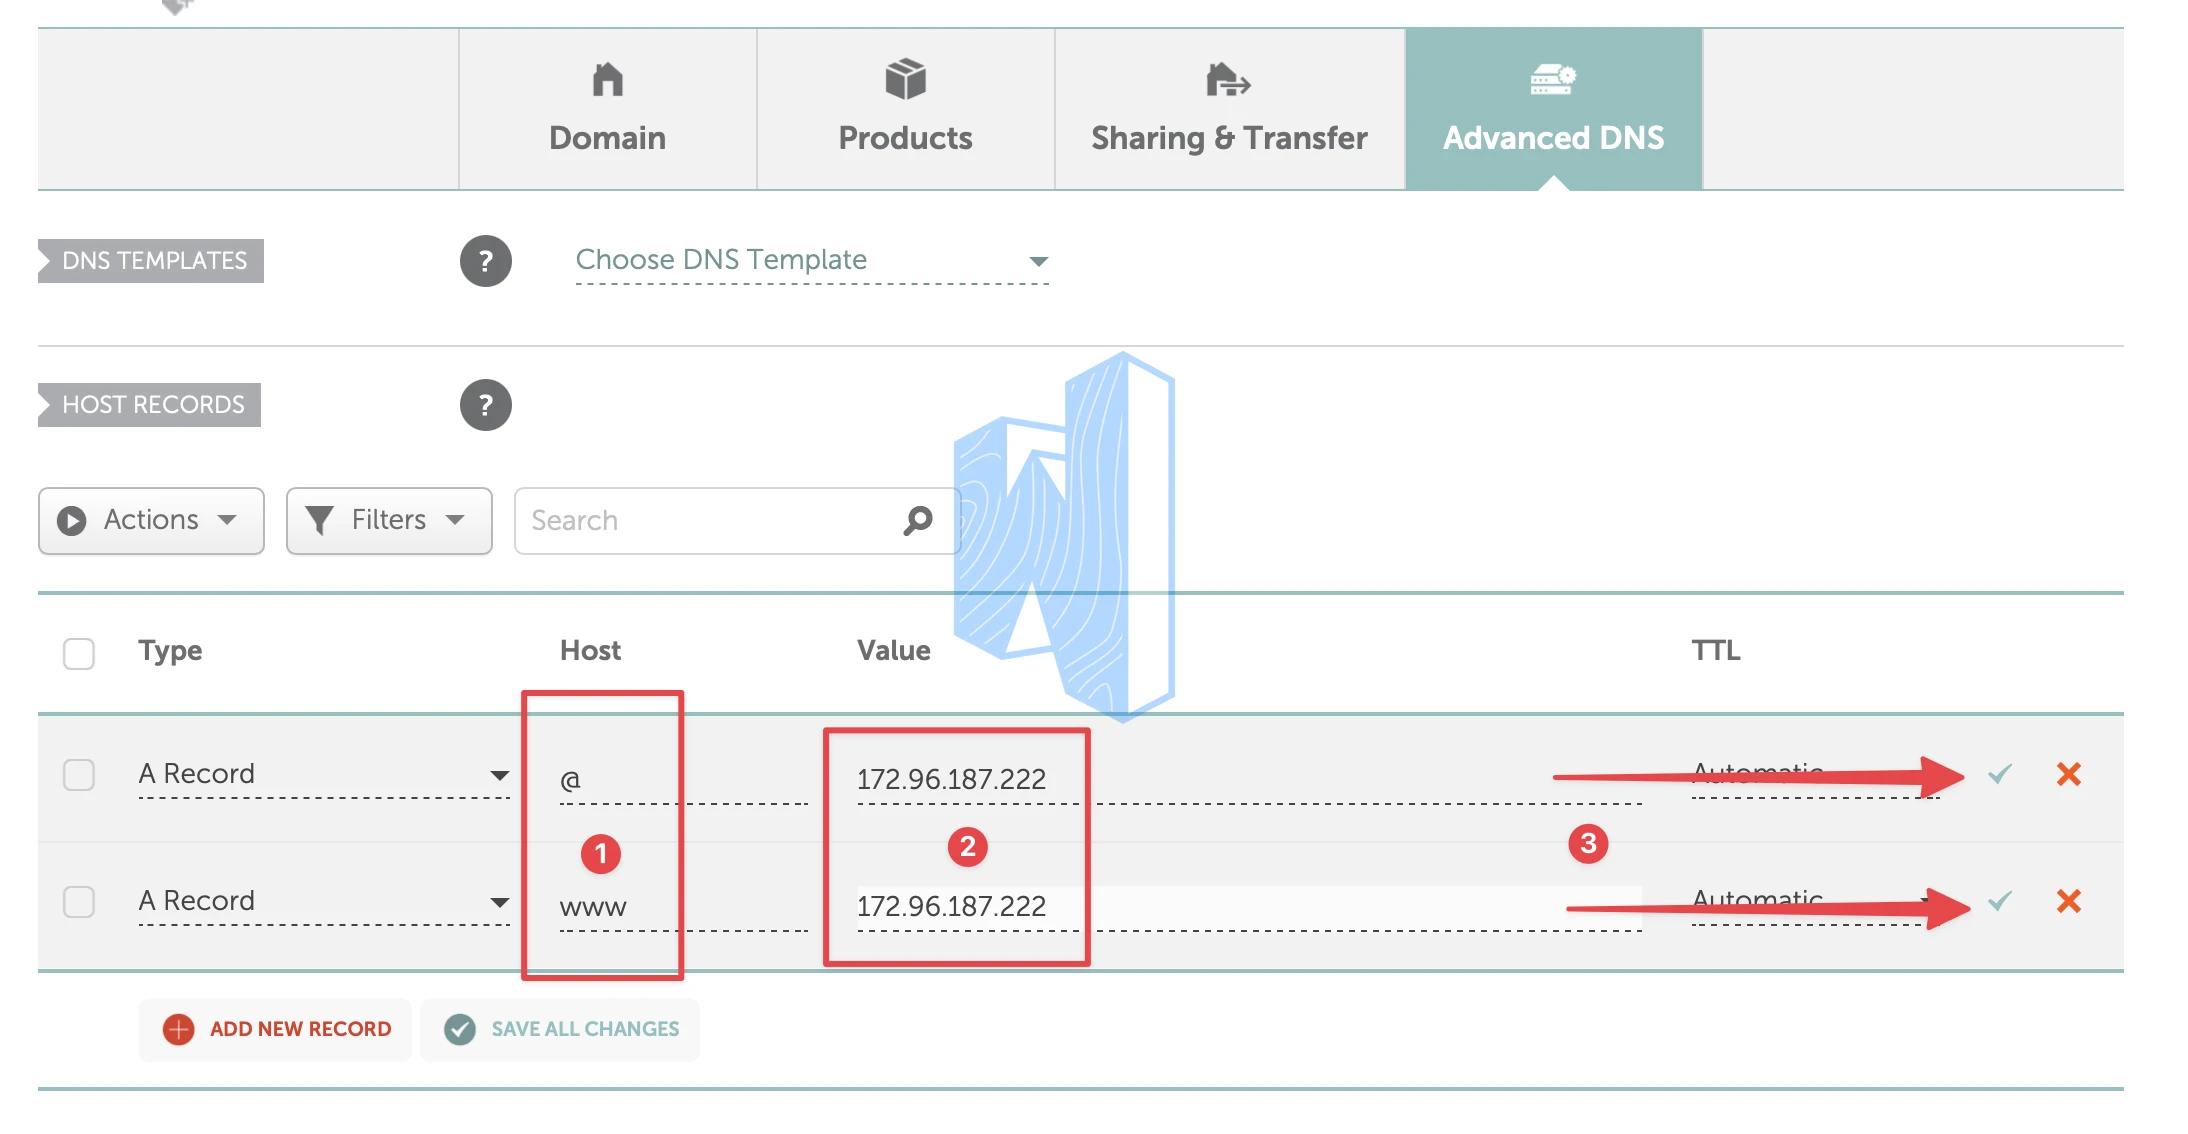
2. Create a new record:
- Type: A Record
- Host: @
- Value: Enter the IP address obtained from Hawkhost.
3. Save your changes by clicking the Tick icon.
Here’s a simplified explanation for setting up DNS records:
- Use @ as the Host to connect your main domain (e.g., domainname.com) to your hosting server.
- Use www to point the www.domainname.com subdomain to your hosting server.
- Use a custom Host (blog, shop,…) to create subdomains like blog.domainname.com, shop.domainname.com and link them to your hosting.
- Use * as the Host to create a wildcard subdomain, automatically redirecting all undefined subdomains (e.g., random.domainname.com) to your hosting.
Note: Although IP updates propagate faster than nameservers, changes can still take some time to reflect globally.
How to Verify Domain Connection
- Visit Your Website: Enter your domain URL in a browser. If the website loads successfully, the connection is complete.
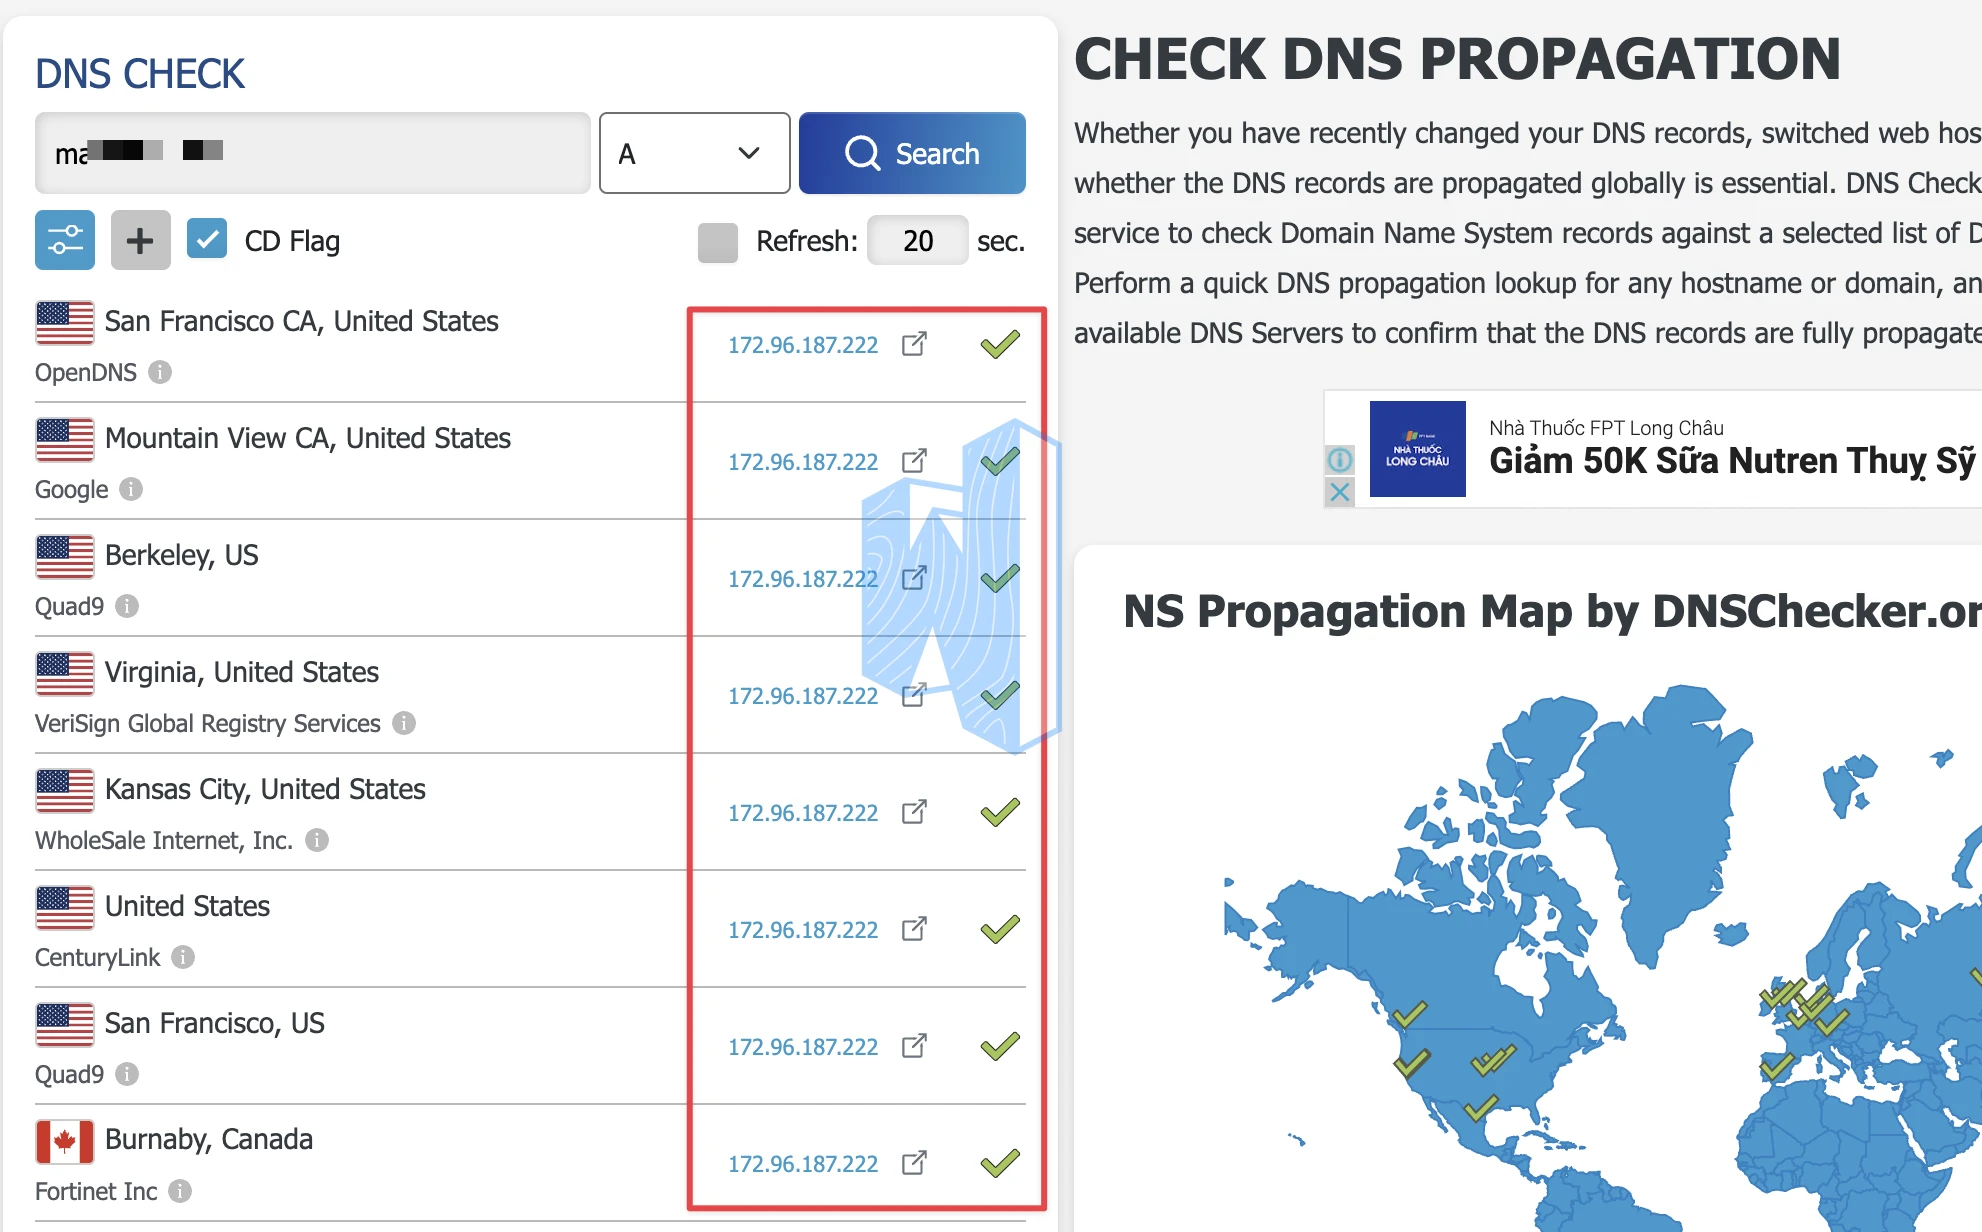
- Use DNS Tools: Tools like DNS Checker or MXToolbox can confirm whether the domain is correctly pointed.
Common Issues and Troubleshooting
- Nameserver Propagation Delays: If changes haven’t propagated after 48 hours, contact your domain registrar or hosting provider for assistance.
- Incorrect Nameserver Entries: Verify the nameserver or IP address details for accuracy.
- DNS Cache Issues: Clear your browser’s DNS cache or try accessing the website from another device.